Chik's Crib

16 November 2022

Bill Yosses' Apple Pie Recipe

November 16, 2022 0
Bill Yosses' Apple Pie Recipe

 I spent a good part of my youth in the province of Nizhny Novgorod, which happens to be the world capital of the apple. In Nizhny Novgorod, there are not simply apple trees scattered about the country-side; there are forests of apple trees - forests as wild and ancient as Russia itself - in which apples grow in every color of the rainbow and in sizes ranging from a walnut to a cannonball. Oh, we'd find them ticked in our omelets at breakfast, floating in our soups at lunch, and stuffed in our pheasants at dinner. Come Christmas, we had eaten every single variety the woods had to offer."

- A Gentleman in Moscow; a novel by Amor Towles

And just like that, like magic, I have become obsessed with apples. 


No matter which part of the world I am in, it seems that supermarkets stock the same few varieties of apples over and over again, which are pretty uninteresting. The thought that there could be thousands of apple varieties, in distinctive shapes and sizes and colours and tastes, was astonishing. And lest you think it’s the author making things up,
this gentleman's retirement hobby of locating lost varieties of apples had him single-handedly tracking down and re-cultivating about a thousand breed of apple trees. 11000 varieties of apples have been estimated to become extinct. Heirloom apples are literally a dying breed. 

Shelburne Farm in Massachusetts isn't quite Nizhny Novgorod, but it does have a healthy couple o' dozen types of apple variety. More than what you can find in a regular supermarket. We had a grand evening picking apples in their orchards, and, if I may say, it's a pretty darn magical place on its own.  

One IKEA bag full of apples later (a much larger bag than the ones the farm was handing out - we couldn’t help ourselves), we left the farm happy and content. Over the next few days, the subtly sweet fragrance beckons at us from the corner of the house. We didn’t have a pheasant to stuff, but I did locate a couple of apple pie recipes. Any time is a good time for apple pie, but there's something particularly special about having one bubbling merrily in the oven on a chilly autumn day. 

Passing out slices of still-warm apple pie fresh from the oven on a Sunday mid-morning, with everyone is gathered around the table - that’s kind of a magic on its own too. 

Bill Yosses’s Apple Pie Recipe

Adapted from People Magazine, on the Obama family's favourite apple pie

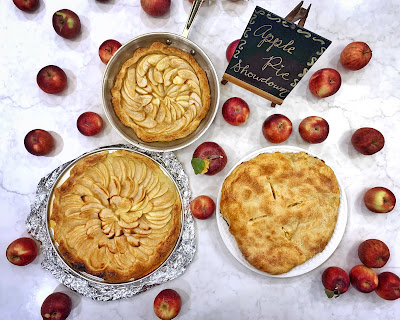
We had so many apples, we indulged in a tasting using a few different recipes. This one here is our favourite. Not all apples are created equal for baking, but honestly, I've never seen anyone turn down a slice of apple pie :) 

INGREDIENTS

For the Dough:

420g (3 cups) all purpose flour
½ teaspoon salt
285g (2 ½ sticks) unsalted butter, at cool room temperature and cut into ¼-inch pieces
6-7 tablespoons ice water
1 egg and 1 teaspoon salt for egg wash

For the Filling:

1.35kg apples, peeled cored and cut into half-inch wedges
200g (1 cup) white sugar
160g (½ cup) honey
65g (½ cup) cornstarch
1 tsp vanilla extract
¼ tsp ground cinnamon
Zest and juice of one lemon

STEPS

The Dough:

1. Combine flour and salt. Then add butter, and work the flour into the butter with your fingertips. Add ice water 1 tablespoon at a time and continue mixing sparingly, until the mixture is a craggy unevenly mixed mess that barely comes together. Fold the dough a few times in on itself, then pat it into a rough rectangular shape. 

2. Divide dough equally and form each piece into a 5-inch disc. Wrap each disc in clingwrap. Refrigerate for at least two hours before using. The dough can be kept in the fridge like this for up to two days. 

3. Grease a 10-inch deep-dish pie pan and set aside. On a lightly floured surface, roll out each disc to form a 14-inch circle. (Don’t be shy about leaving the dough thick; a nice thick crust provides the crunch in each bite!). Refrigerate one between sheets of cling wrap or parchment paper; that will become the top pie crust. Place the other rolled-out dough in the pie pan, leaving a one-inch overhang. Fold the overhang under itself and pinch them together to form a fluted edge. Chill the dough in the pie pan for at least 30 minutes (and up to overnight.)

4. Preheat oven to 190ºC (375ºF). Remove the pie pan with the bottom crust from the refrigerator and let it warm up at room temperature for five to ten minutes. Line with foil and fill with pie weights, in a quantity sufficient to press up against the wall of the dough to prevent its collapse during baking (I use sugar). Bake for 30 minutes, until lightly browned. Remove from oven and lift out foil and pie weights; allow pie shell to cool for 10 minutes.

The Filling:

1. In a large saucepan, combine sugar and cornstarch, then add apples, honey, vanilla, cinnamon, lemon juice and zest. Let stand for 20 minutes.

2. Bring the mixture to a boil over medium heat, stirring occasionally to ensure the fruit doesn't stick to the bottom and burn. When the mixture has thickened slightly, remove from heat and let cool.

3. Whisk egg and salt together, and brush the egg mixture over the circumference of the prebaked pie shell. Fill the prebaked shell with the apple filling, and then lay the second (raw) dough over the pie shell. Press very gently around the edges to make sure the egg wash seals the top pie dough to the bottom pre-baked crust. With a sharp knife, puncture the top pie dough to make steam vents, twisting the knife as you puncture each vent to ensure a larger hole. Brush top with remaining egg wash and sprinkle generously with sugar.

4. Bake another 30-40 minutes, until the top pie crust is golden brown and apple filling is bubbling out of the vents. Remove to a cooling rack and allow to cool for 1-2 hours before serving. 


20 August 2022

Mac and Cheese Recipe

August 20, 2022 0
Mac and Cheese Recipe

Mac and cheese is hearty, cheesy and hits all the right spot. But damn, if it isn’t just too cloying to eat a full portion by myself. Like most food in life, mac and cheese tastes better when shared.

Another thing that makes mac and cheese tastes better is (You guessed it!) being served that a 6.5-inch Lodge cast iron pan.

This winning recipe asks for three types of cheeses: Grana Padano, Jarlsberg and white cheddar. The steps are simple enough to follow, and when I made it recently in my trip to Boston, the taste blew everybody away. This mac and cheese recipe is simply as good as they come.  

The hardest part about this recipe is finding all those cheeses the recipe calls for, and maybe paying for it (wow look at the prices!) at the cashier afterwards. When in Singapore, I had some trouble collecting those specific cheeses, but it's usually available at grocery stores with a larger selection of cheeses. 

What I liked about this recipe was the amalgram of the macaroni's creaminess with the layer of blistered melted cheese. Sure, the specific blend of cheeses give it a particular nuttiness and sharpness, but when I had trouble finding these cheeses, I pretty much used whatever substitute that I could get my hands on, which I found didn't really affect the texture of the final dish. Because of a happy accident with online grocery shopping, I wound up with an excess of Parmagiano-Reggiano, so I had used that instead of Grana Padano. In a separate attempt, a wedge of Prästost bought from IKEA (a Swedish cheese translating to 'Priest cheese') ended up in my dish tooMac and cheese is a comfort food. It's a no-fuss kitchen staple that families make from whatever they could get, whether if it's from a Kraft box or from Velveeta or government cheese (which are surplus cheeses made by American farmers and sold to the US government to prop up their dairy industry. The surplus cheeses were stored underground, and at one point, they had 1.4 billion pounds of cheeses in stock). So, really, there's no need to stress over what cheeses you can get. 


Mac and Cheese 
Original Recipe by Ashley Christensen in Pooles: Recipes and Stories From a Modern Diner
Makes enough to fill 2 6.5-inch cast-iron pans. Any oven-safe vessels such as gratin dishes, pie pans or ramekins would do nicely too. 

From my numerous attempts with this recipe, heavy cream leads to the best results: the macaroni is rich, smooth and luscious. Using half-and-half will cause to a grainier, slightly broken cheese sauce. I've tried using all milk before, but the cheese sauce became much too runny and grainy. If I'm cooking for myself as a regular home-cooked meal, half-and-half is good enough. If I have company over, I'll reach for the heavy cream.     

INGREDIENTS
170g (6 ounces) dry elbow macaroni
Fine sea salt
1 teaspoon vegetable oil
50g (2 ounces) Grana Padano*, shredded
50g (2 ounces) Jarlsberg**, shredded
170g (6 ounces) white cheddar, shredded
480ml (2 cups) heavy cream


STEPS
1. In medium-sized saucepan, add elbow macaroni and fill the pan up with boiling water just until the macaroni is fully covered. Add sea salt. Cook until barely al dente (about 1 minute less than the suggested cooking time on the macaroni package), then drain the macaroni. 

2. Combine the macaroni with vegetable oil to prevent sticking and spread the macaroni out on a baking tray so it cools fast to prevent overcooking. 

3. Combine the shredded cheeses, and set aside.

4. In a large saucepan, combine cream and 1 teaspoon sea salt. Heat over medium heat until it comes to a boil. Turn down the heat and let simmer for 2 minutes before adding the cooled macaroni. Cook for 90 seconds while cream begins to thicken. 

5. Add 40% of cheese into the macaroni mixture in small handfuls. Allow each batch of cheese to melt before adding the next handful. Remove pan from the heat and transfer the macaroni mixture into a baking dish of your choice. Place the remaining 60% of cheese over the top. 

6. Set a rack in the oven about 4 inches from the top and then on the broiler. Let the oven heat up for about 3-5 minutes. 

7. Place the baking dish on a oven tray (to catch the invariable spill) just before you put it in the oven under the broiler. Broil for about 3 to 5 minutes, until the cheese melts and develops a golden-brown crust. Rotate the dish to ensure even browning. A butane torch would work too, for those ovens without a broiler function.  

8. Remove from oven, let rest for 5 minutes, then serve. 


25 April 2022

Banana Foster Recipe

April 25, 2022 0
Banana Foster Recipe

It seems that nowadays, every cooking forum has people extolling the virtues of cast iron pans. People dwell on their longevity, their hardiness, their second-to-none ability to hold heat and give a good sear. And I gotta tell ya, I’m pretty impressed with my cast iron pans. They are pretty great. 

So what if my wee 6.5-inch pan couldn’t fit a steak? And does it really matter, given that cast iron is more high-maintenance, that I still reach for my stainless steel as a defaultThere are more important considerations for purchasing a cast iron pan: for example, how it makes the food you cook looks good. And that’s where a cast iron pan truly shines.  

My current obsession is Banana Foster. It’s a dressed-up banana split: a pan filled with tender bananas macerating in warm caramel sauce, which is topped with scoops of ice cream and served straight from the stove. It’s easy as ABC to put together and tastes like a treat. 

My folks are firmly in the Alice Waters camp that when a fruit ripens to the point when it's good to eat on its own, it is best enjoyed by itself, and shouldn't be cooked with. And, with them not being fans of overly-sweet desserts, they gave me the stink eye when I added perfectly-ripened bananas to a simmering pan of caramel. But my counter argument was infallible: unlike other fruits, bananas are guaranteed to be sweet when ripened. I don’t think I have ever had a bad banana. Most varieties of bananas taste a little starchy, and cooking them down tenderises them and removes their starchy texture*.

And judging by how fast this dessert disappeared, I do think everybody eventually came around to my point of view.

*I love banana splits as a kid, but over the years, I found that the starchiness of raw bananas distracts the creamy texture of ice cream. Though, if you can get your hands on red bananas that are indigenous to South East Asia, they lack the starchiness that makes them perfect for banana splits.

Banana Foster 

INGREDIENTS

30g unsalted butter

60g dark brown sugar 

1/4 tsp cinnamon

3 bananas, sliced lengthwise  

Ice cream, pre-scooped 

40ml rum (optional)

Pecan, whole or halved (optional)


STEPS

1. Place butter, dark brown sugar and cinnamon in a small skillet. Set it over low heat and let the butter gently melt, stirring occasionally to combine the melted butter with the brown sugar. If the melted butter is not mixing well with the dry ingredients, you can add 1-2 more dark brown sugar to help bring everything together. It should look like a thick slurry at this stage. 


2. Add sliced bananas and gently spoon the warm caramel sauce over them, making sure each piece gets equal time macerating in the sauce. They should begin to soften in 1-2 minutes. At this stage, the brown sugar melts fully, and the sauce should thin out. When the banana is soft and pliable, turn off the heat and remove the pan from stove.  


SERVING
Reserve couple of tablespoons of the caramel sauce. Add the scoops of ice cream over the top, drizzle over with caramel sauce and top with pecan. Serve immediately.   


TIPS

Flambéed banana foster: Prior to serving, heat up rum in a small saucepan set over low heat, until the rum begins to simmer at the edges. Remove from heat, and using either a kitchen torch or a long matchstick, ignite the fumes near the surface of the rum. Pour over the banana foster. As the flames die down, stir, add ice cream and pecans. Serve immediately. (If you have young nieces and nephews, as I do, you can bedazzle and befuddle them with this flambéed version. Just as befuddled would be their parents, to whom I might have expressively told that I had made desserts for their kids, before rum had been added. But that's okay.  

07 April 2022

Provolone for Breakfast

April 07, 2022 0
Provolone for Breakfast

Since a recent visit to an Argentinian restaurant where we scooped up melted provoleta with fugazetta (Argentinian stuffed pizza), I've been low-key obsessed with recreating the dish at home. It was a real-life enactment of every pizza commercial: warm molten cheese stretching from the tabletop to the height of your arm span as you dip crisp toasted bread into the cheese and devour it whole

Months later, I finally bit the bullet and bought myself a couple of Lodge cast-iron skillets. For a couple of heavy cookware that were made half the world away, they are surprisingly affordable! I got a 6.5-inch and a 10.25-inch pan which was just about $60 total. 

Cast iron pans have a cult following for many reasons: their durability and longevity, an ability to hold heat and deliver a great sear, the ease of use for both stovetops and oven, and an eventual non-stick surface. But I'm keeping it real: I bought a wee 6.5 inch pan just so I can indulge my desire to eat melted cheese in the comforts of my home. #nightcheesehabit

My decision composition for buying a cast iron: 30% for durability, 10% for its good sear and 90% because they look just fabulous. Is that how percentages work?

Also, should I really be standing over the pan taking pictures for the ‘gram as the oil smokes during the seasoning process? A question for another day.


I bought a set of cork-based place mats to use with my cast-iron pans, and let's just say, I'm glad I didn't go for plastic or silicone.

Provoleta is a traditional cheese made in Argentina, and can be tricky to find in other countries. Luckily, provolone, their Italian cousin, more widely available and makes a decent substitute. The ones I see in well-stocked grocery stores are sold in thick slabs or in 500g blocks. While melted provoleta is traditionally served as an appetiser for a meat-forward meal, I actually really like cooking and serving this for breakfast. There, I said it. Fight me. 

It's the ideal Breakfast Food; it's faster than making an omelette, and with even less effort. The cheese melts in just a matter of minutes over a fire or in the oven, which is the right amount of time needed to fix myself a cuppa. It's perfect with toasted bread, like the world's fanciest Nutella. And unlike eggs, which messes with your perception of how coffee tastes, provolone cheese has no such problems.   

At this point, you may be wondering, this have all been quite a lot of words and paragraphs, and where is the picture of my provolone cheese in my incredibly-photogenic cast iron pan? Well done. That is a very good catch and you’ll go far in life. Well, I've decided that tinkling around with a recipe while taking pictures is quite daunting, actually. Especially when I have got to schedule my workflow around mealtimes and natural lighting. So I’ve decided to take a step back, do what I can and then take my photos at a later date, when the opportunity presents itself. In other news, I’ve come to terms with the fact that I’m incredibly lazy. Cheers. 

Melted Provolone

If you like, you may simply melt the cheese with sprinkles of herbs and chili flakes, have it for breakfast and call it a day. As I often do. But this is the Internet, where everybody presents a stylised version of their lives. So let's put in a bit more effort in our recipes, for the three of you who are actually reading this site, and for the one person who Googled 'hot chicks' and found his way here. And by more effort, I mean plagarise the Argentinian restaurant I went to and add in some sliced shallots.      

INGREDIENTS
A clove of garlic
100-150g provolone cheese
A big pinch red chili flakes
A big pinch of oregano (Or thyme. Or, y'know those bottled mix generically labelled ‘Italian Herbs’? Yeah. Use those. It'll be fine.)
2 shallots, sliced into thin strips

STEPS
1) In your beloved 6.5 inch Lodge cast-iron skillet* (Oh, you don't have one? Shame.), rub a clove of garlic over the interior. Stow the rest of the garlic away for other dishes; adding a whole garlic would overwhelm the rest of the dish. 

2) Add the provolone and let the cheese melt gently over medium heat. Add sliced shallot, chili flakes and the rest of the herbs.

3) When the cheese is fully melted, remove the skillet from the stove and serve immediately with thickly sliced bread (about an inch per slice). 

*A heat proof cookware, like a baking dish or a shallow ramekin, may be used. 

Tips 
There aren’t many things that don’t go well with melted cheese. You can use dukkah instead of Italian herbs.  You can serve it alongside traditional chimichurri, or with a heap of browned onions. Sliced crusty bread is a natural accompaniment to cheese, but you can also use firm biscuits or even boiled skin-on potatoes, à la raclette. But let’s keep it simple for breakfast, shall we?  

Using an Oven: set a tray in the upper third rack of your oven, and preheat your oven to the highest temperature. Assemble the ingredients in the skillet as described above, and then place the skillet in the oven for about 5-10 minutes, until the cheese is melted. 

29th April 2022: Okay, so I have finally gotten around to taking some pictures.


24 March 2022

Thai Basil Pork Recipe

March 24, 2022 0
Thai Basil Pork Recipe

Back when I was doing shift work in Emergency, and getting off work in the wee hours, one of my favourite supper spots was a Thai restaurant from around my house. Pad kra pao, or Thai Basil Pork, was one of my go-to dish. It's a bowl of white rice served alongside a crisp fried egg with lacy edges and a small mountain of stir-fry minced pork. 

My family discovered fish sauce only recently. It's not a common ingredient in Cantonese or Hokkein cuisines, though after a successful rendition of Vietnamese Caramelised Chicken last year, fish sauce is now a staple in my house. It's commonly called for in Hakka, Vietnamese and Thai cuisines. It's used rather sparingly, but each use imparts a dish complex, heady hit of unami. Back when I had a surplus of canned tuna and maple syrup on hand, I would use this Caramelised Fish Sauce Tuna recipe as a quick dish served along rice. 


My recent acquired Thai Holy Basil plant is proving itself to be hardier than its Italian cousin and had provided an ample supply of leaves for this dish. This has become one of my go-to for a quick Sunday stir-fry for the whole family. 


Thai Basil Pork (Pad kra pao)

Adapted from Woks of Life

This recipe is fuss-free and can be done on any cookware. I use my stainless steel skillet, though I'm eyeing a carbon steel wok for future stir-fry recipes. While I'm still saving up for a wok (and also convincing my parents to use one; they do not fancy the maintenance required to keep the wok rust-free), this recipe already is plenty delicious with a regular home burner and stainless steel skillet.    


INGREDIENTS

1 teaspoon sugar

1 tablespoon fish sauce

1 tablespoon thin/light soy sauce

2 teaspoons dark soy sauce

2 teaspoons oyster sauce


2 shallots, thinly sliced

7 cloves garlic, thinly sliced

3 Thai bird or holland chilies, thinly sliced

450g ground pork, unseasoned 

⅓ cup low sodium chicken broth or water

Holy basil leaves (about 1 1/2 cups packed)


STEPS

In a small bowl, combine sugar, fish sauce, soy sauce, dark soy sauce, oyster sauce and chicken broth/water. Set aside.


In a wok or large saucepan set over medium high heat, add 3 tbsp of vegetable oil. Add shallots and garlic and cook for 3 minutes, stirring occasionally. Add chilies and cook for another minute. Increase heat to high and add the ground pork. Stir well, breaking the pork up into smaller bits and allowing it to crisp up. 


Stir-fry for another minute and deglaze the pan with the broth or water. Let some of the liquid evaporate, but not avoid completely letting all the water cook away, as the sauce would make a good accompaniment drizzled over rice. Add the basil leaves and stir-fry until wilted. Serve over rice and a fried egg.