

Following the not-so-ideal execution of my cocoa cookies where I ended up on a late night oven-shopping excursion, I thought I should get to know my new purchase a little better. I channeled my inner Ned-and-Chuck to bake up a recipe that's easy as, well, pie. Who couldn't use a slice of Pushing Daisies magic in their lives?
This pie is almost-magical - I've never seen my family take to a dessert quite as quickly. It must've been the combination of the visual appeal (we're a sucker for fruits), the bold chocolate profile, and a subtle sweetness - barely imperceptible - backing the light custard.
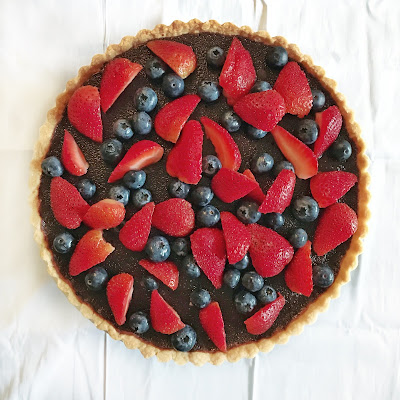
At its core, it's a chocolate pudding dressed up in a baked tart. If you enjoy the occasional warm chocolate pudding, you'll love this one: a chocolate pudding poured into a warm tart and served fresh from the oven. What's not to love? (A tart means you get to eat even more butter!) The assay of berries over the tart completes a photogenic appearance and assuages any and all health-related guilt.

There's an deep-seated satisfaction pulling a warm pastry is out of the oven, and taking in the irresistible fragrance of a buttery tart. A colder climate would suit eating the tart as soon as you can wrangle the metal ring off, while in Singapore, the contrast of a still-heated tart alongside chilled berries hits all the right notes. The pleasure of gathering around a tart with family and tucking in gives the tart a magical experience.
And that brings us to a Pushing Daisies quote on the warmth of sharing a pie...
"Musing on the idea of setting someone on fire doesn't mean you really want to set them on fire. It's just the thought of it that makes you happy."— Olive Snook
Oh you meant a spiritual warmth? Hmmm.

“Pie is home. People always come home.” — Ned
Warm Chocolate Tart Recipe
Makes one 9-1/2 inch pie
Recipe adapted from Seriously Bitter Sweet by Alice Medrich (Artisan Books)
Recipe adapted from Seriously Bitter Sweet by Alice Medrich (Artisan Books)
INGREDIENTS
Crust:
7 tablespoons (100 grams) unsalted butter, melted
¾ teaspoon pure vanilla extract
1 cup (130 grams) all-purpose flour
7 tablespoons (100 grams) unsalted butter, melted
¼ cup (50 grams) sugar
⅛ teaspoon salt¾ teaspoon pure vanilla extract
1 cup (130 grams) all-purpose flour
Filling:
3 tablespoons (45 grams) unsalted butter, cut into chunks
½ cup (100 grams) sugar
¼ cup (25 grams) premium unsweetened cocoa powder (natural or Dutch-process) (see VARIATION below)
1 cup heavy cream
1¼ teaspoons instant espresso/coffee powder (optional)
½ teaspoon pure vanilla extract
1 large egg, lightly beaten
STEPS
1. Preheat the oven to 175°C (350°F). Set a rack in the lower third of the oven.
2. Tart crust:
Mix the melted butter, sugar, salt, and vanilla in a medium-sized bowl. Add flour and mix until combined. The dough may seem soft - it's fine! Press the dough evenly into tart pan, as well as up the sides. Bake the tart just as it is, without pricking it with the tines of a fork, for 20 to 25 minutes, or until the crust is a deep golden brown.
3. Filling:
While the tart is in the oven, combine the butter, sugar, cocoa powder, and cream in a saucepan. Stir constantly over medium heat until it begins to simmer around the edges. Remove from the heat. Stir in the espresso powder, if using, and vanilla.
While the tart is in the oven, combine the butter, sugar, cocoa powder, and cream in a saucepan. Stir constantly over medium heat until it begins to simmer around the edges. Remove from the heat. Stir in the espresso powder, if using, and vanilla.
4. Keep a close lookout for the tart crust. Just before the crust is ready, whisk the egg into the hot chocolate mixture, and pour the filling into the hot crust. Turn off the oven, but leave the tart in. The residual heat will continue to cook and set the filling. It's done when the filling is set along the sides, but quiver in the center when the pan is nudged, about 10 to 12 minutes. If the filling has not set, turn the oven back on and bake for a while more at a lower temperature.
Cool on a rack. Serve the tart while warm.
VARIATION (as suggested by Alice)
Walnut Tart:
In a food processor, blend 35 grams (⅓ cup) walnut pieces with 105 grams (¾ cup) flour until fine. Substitute this mixture for the flour.
Reduce the butter to 85 grams (6 tablespoons) and add 2 teaspoons brandy and 1 teaspoon instant espresso powder (or a heaping teaspoon instant coffee powder or crystals) with the sugar, salt and vanilla.
You could also make it with toasted skinned hazelnuts, then I would omit the espresso powder.
Cocoa powder
Natural cocoa powder has a livelier, more complex, fruity flavor, while Dutch-process cocoa has a cozy old-fashioned flavor reminiscent of chocolate pudding. Both works well here.


