2017 - Chik's Crib

30 December 2017

ENAQ The Prata Shop

December 30, 2017 0
ENAQ The Prata Shop
Finally, a prata shop in the West worth traveling for!
Situated besides Ghim Moh Market, ENAQ The Prata Shop opened its doors just this year. We got clued in by Miss XS's friend into this place, and the first time I came, I was so impressed that I returned within the same week. Most pratas are on the soggy side, but not these babies here: the prata is made fresh to order, with a blistered crispy surface that belies a softer, fluffy interior. I ordered a plain and a plaster prata. The curry is decidedly non-spicy, but still rich and satisfying. I enjoyed how thick the pratas are, but Miss XS did comment that they were really filling, and perhaps too chewy inside. She could only manage about 3/4 through her plaster prata, but that only means more for me. Ha!

ENAQ reminded me of the now-defunct Ah Mei Cafe. Both are prata shops that are run by Chinese (I did a double-take when I walked through the doors here), and both serve really good crisp pratas. Maybe it's because the Chinese owners know what texture Singaporean Chinese are looking for? 

Another point in ENAQ's favour: the service is prompt and efficient. Orders - requests for more curry - were promptly served asap.  

Address
21 Ghim Moh Rd, Singapore 270021

Opening hours
9am to 8pm daily

24 December 2017

Brother Burger and the Marvellous Brew (South Yarra)

December 24, 2017 0
Brother Burger and the Marvellous Brew (South Yarra)
One perk of living in Melbourne is that no matter where you are, you are never far from a great burger place. Amongst all the burger places, a few has retained a revered place in my heart - and Brother Burger is one of them. Despite the few years between my last visit and today (Fitzroy ain't the easiest to get to from the south of Melbourne!), I still remember every crunch of their delectable Onion Rings (Large $9.80) - thick-sliced and juicy on the inside, generously battered and perfectly salted on the outside. Three years later, they were as good as ever. The portion size for onion rings ain't that big, so if you're sharing, don't be afraid to get the large size. 

As a testimonial to the quality of their beef, the patties here are done to medium-rare and retains a pinkish tinge in the middle. J and R raved about the double-patty Oh Brother, while several of us had the Royal Blue ($16.60). The accompanying blue cheese dressing was rich in flavor, and gave each bite a pronounced tang. It can get overwhelming for the uninitiated, but distinguished the blue cheese aficionados from the rest of the party. If you're not a fan of blue cheese, J and R adored the Oh Brother ($18.80)- a double patty, double cheese extravanganza. 
Personally, the star of the night was Bogan Wings ($18.80 per kilo). I was never one for chicken wings - they usually have too little meat-to-bone ratio for me - but I'm a convert from this night on. The sticky cola-bourbon sauce was delightful, with a slightly complex bitter aftertaste. Everybody had a wing or two, but at the end of the night, the substantial pile of bones on my plate showed that nobody managed to as many wings as I did. 
Shoestring Fries with Mayo Truffle (Large-$8.80 + $2.80) enjoys great popularity online. On first bite, it's pretty impressive; the truffle shone through the mayonnaise dip sharp and clear. They clearly don't skimp on the good stuff. Midway through though, I had a change of heart: dipping deep-fried fries in a combination of truffle oil and mayonnaise makes the oiliness of them all overtly pronounced. Skip the normal fries, and go for their Sweet Potato Fries ($9.80) instead.  

Brother Burger Menu, Reviews, Photos, Location and Info - Zomato

16 December 2017

Thai Tea Ice Cream Recipe

December 16, 2017 0
Thai Tea Ice Cream Recipe
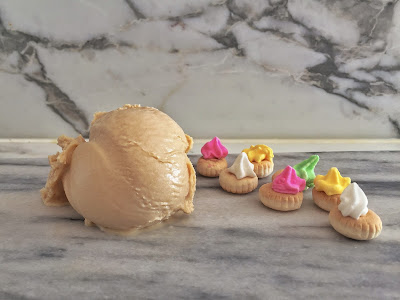
What a journey! I started experimenting with Thai tea ice cream since 2016, but it took almost two years before I'm happy with the final product. 


A trip to Thailand a few years ago whetted my craving for Thai Iced Tea, and I haven't been able to quite get it out of my head. In the blazing humidity of Phuket, sipping from a chilled cup of sweetened Thai tea go a fair bit in making the sun bearable. Back in Singapore, where we suffer from the same ferocity of the sun, Cha Thai provides me with my tea fix. In the Melbournian winter, I keep warm with hot Thai tea that I brew. (Number One brand is one of the better commercial brands for Thai Tea leaves, and available at $5.50 per 400g from the Asian grocers in Clayton across Coles.) The best Thai tea, a Bangkok friend helpfully informed me, is made by boiling the tea leaves in evaporated milk, and then sweetening each cup with a dollop of condensed milk and served over ice. (No wonder it tastes so good!) I haven't worked out the courage to try that at home, and content myself with using boiling water instead. In making ice cream however, all bets are off. Because adding water causes the ice cream to become icy, tea leaves are boiled with cream and milk. 

The team at Serious Eats and the community at Food52 have come up with their version of Thai Tea. I tried both recipes side-by-side, and I had adapted Food52's recipe as below. If you're interested, see the explanation below on what's good (and what's not!) for both recipes. 
Thai Tea Ice Cream
Makes roughly 1 quart
Adapted from Food52
Some bloggers (David Lebovitz, an alumni of Chez Panisse and authors of several cookbooks) have similar tastes in regards to sweetness as I do, but most community-submitted recipes are far too sweet for my taste. I suspect I'm not alone. When chatting to a few baking friends, most reflect similar views. I've adjusted the condensed milk proportion to reflect my taste, which seemed to be the consensus of my house mates as well. 


INGREDIENTS
375g heavy cream
480g (2 cups) whole milk 
1 dash salt
90g (1 cup) Thai tea leaves
2 egg yolks
1 teaspoon vanilla
200g condensed milk

STEPS
1) In a small saucepan set over medium heat, combine heavy cream, salt, and milk with tea leaves until almost simmering. Remove from flame and steep until at room temperature

2) Strain the tea leaves from the mixture and discard. The liquid content may seem really little, and may look like a tea-leaves-slurry-from-hell, but it's all part of the plan! Remember we haven't added the condensed milk or the egg yolks yet. Just strain out as much tea leaves as you can. (One good tip that I'd found online was to use a handkerchief for fine straining purposes. I hadn't tried that for myself yet, and will update this page after I do.)

3) Beat egg yolks into the mixture, and gently heat over a small flame until the mixture thickens. The mixture should coat a spatula and running your finger across the spatula should leave a line that remains. Remove from heat and stir in the vanilla and condensed milk. Let chill completely before freezing according to ice cream maker's instructions.

==========================================

THE COMPARISON: SERIOUS EATS AND FOOD52
First off: Food52's recipe wins for appearance. It develops a vibrant deep amber, likely courtesy of the recipe stipulating twice as amount of Thai tea leaves as Serious Eats. 

Texture-wise, Food52 takes the cake too. Freshly-churned from the ice cream maker, it's soft, sticky and dense, almost like a gelato's consistency. After a night in the freezer, it hardens but still retains a spherical shape from a scoop. Serious Eats creates an icier version with flecks of thai tea leaves left on your tongue after the ice cream melts away - and there's no way to change that. Which brings me to the most important point...

Preparation: the most time consuming part is straining out the tea leaves - seriously, it takes ages. In this regard, Food52's version wins hands-down. You sift the tea leaves from the cream and milk while the mixture is still runny, then add the egg yolks in. Virtually no tea leaves could be seen. Serious Eat's recipe mixes the egg yolks in before sifting the tea leaves off, and the thickened mixture both takes a long time and results in a mixture that still contains many large speckles of tea leaves. 

Another boon in Food52's favour: Food52 uses two egg yolks compared to Serious Eats's six eggs yolks. As someone who still have a dozen egg whites from previous recipes frozen in the freezer, I'm keen not to add to my stockpile further.  

So it looks like a rout for Food52... except not quite. The original recipe uses one can of condensed milk, which resulted in an intense cloyingly sweetness that turned one's stomach. The container holding Thai tea ice cream by Serious Eats, for all of its fault, emptied within a few days in the freezer, while the container of Food52's Thai tea ice cream languished for the next few weeks. Here, I've dialed down the sweetness here to a more nuanced level: I increased the amount of heavy cream by 140g, and cut the condensed milk to 1/2 of the original quantity. This resulted in an ice cream consistency that's still smooth and sticky without being overtly sweet. 


10 December 2017

Spicy Beef Stew Recipe

December 10, 2017 0
Spicy Beef Stew Recipe
Ever since my friend made me a bowl of this stew, I was hooked on the taste faster than you can say moo. Our Sweet Potato Cake was taking longer to bake than anticipated, and when she made lunch for herself, she gave me a bowl to stave off my blues. (Or maybe she knew I wouldn't stop bugging her until I got my own bowl...) It was a bowl filled with the softest, most tender beef ribs with kimchi and shiitake mushrooms, and flavored with a spicy broth with a deep unami kick. The broth was thick and flavorful, almost like it was meant to be sold at a ramen joint. 

She graciously passed me the recipe, and we eventually turned our attention back to the cake that we were baking. But I couldn't get this spicy beef stew out of my head, and I had to make it again - and soon. I hadn't had half the ingredients in the original recipe, and as the year draws to a close, I should be curtailing my personal belongings so I don't have nightmares in a few weeks' time about packing. But still, I couldn't just give it up. I made a trip to the Asian grocers at Clayton - if you can't find an Asian product there, it doesn't exist. It took a while to gather the ingredients, until the store assistant let me on that while gochujang and kimchi could be found on the Korean shelves, dashi belongs in the Japanese section, and doubanjiang is Chinese.  
Dashi concentrate (left), doubanjiang (right, top), gochujang (bottom, right)
The multiculturalism of this stew threw me for a loop; I thought it was a traditional Korean stew!, until I figured that why stress over something like that? As someone with the bigger picture in mind once said "who cares if it's a black cat or a white cat, as long as it catches mice, it's a good cat." If the combination of ingredients from several cultures is what it takes to fill my pot with a low-effort, highly-addictive broth, I'll embrace that. In many ways, this pot of stew showcases the pride of Melbourne as a melting pot: it's a city with an eclectic mix of cultures. There's a place for everybody, and the fusion of ingredients from one another's cuisine creates a new take on a traditional dish. 

Spicy Beef Stew
Makes 8-10 servings
Adapted from Make Food Eat Food

I've tried both radish kimchi and regular cabbage kimchi, and enjoyed either. As with most stews, the recipe is very flexible and ingredients like meat or vegetables or mushrooms can be added in any proportions you like. The original recipe has a lot of steps and ingredients, which I've simplified to make into a one-pot, no-fuss recipe. 

INGREDIENTS
1kg beef short ribs 
One onion, peeled and sliced 
10 cloves of garlic, smashed 
4 tbsp gochujang 
3 tbsp doubanjiang 
2 tbsp dashi concentrate 
1 cup of kimchi 
300g dried shiitake mushrooms, sliced or whole 
1.6L boiling water
Ramen-style noodles (optional)

STEPS: 
1. Lightly season the beef with salt. About half an hour to 1 hour before you start, soak the dried shiitake mushrooms in a large bowl. 

2. Set your stockpot over high heat, and pour a layer of oil into the pot. Add the beef short ribs in a single layer and cook until browned on all sides. Add onion and garlic and stir until lightly browned. 

3. Add gochujangdoubanjiang and dashi. Pour the hot water into the pot, until the water covers the beef. Add the mushrooms. Scrape the bottom of the pot to release any flavoured brown bits.  

4. Let the stew come to a boil before reducing the flame to a simmer. Cover and let simmer for 3-4 hours, until the beef is thoroughly soft and breaks apart easily. Top up more water periodically as necessary. 

5. Add the kimchi and let simmer for half an hour before serving.  

11 November 2017

Warragul, Moyarra and Loch (Prom Country) - BEST DAY TRIP

November 11, 2017 0
Warragul, Moyarra and Loch (Prom Country) - BEST DAY TRIP
It's strange how little-known Warragul or Prom Country are as road trip destinations. I can't remember the last time I had so much fun on a day trip! Our trip was packed with a bustling farmer's market, a cheese farm and a local distillery producing small batches of top-quality gins and beers. I never knew such gems could be found so close to home. They really should be more popular!
We headed off bright and early at 8am and reached Warragul in good time just over an hour later. Warragul hosts a Farmer's Market on the third Saturday of every month, and farmers and craftsmen gather from neighbouring counties to display their wares. From award-winning olive oils to fresh loaves of breads, from vegetables plucked on the same day to premium cuts of angus beef, there's a little of something for everyone.  
The smell of food greets us from the first step into the market: there's the rich unmistakable scent of roasted coffee. The promising sizzle of wedges and fried chicken gives a sense of warmth to the atmosphere, and the quick deft movements of the crepe-seller adds to the hustle and bustle of the market. Near the middle, a man makes brisk business selling chai lattes, and people walk from stall to stall clutching his porcelain cups as they take in the rest of the market. Score one for his eco-friendliness, and another for his mad skills juggling counter-duty while watching over his boiling vats and prepping the orders of chai lattes. I bought a loaf of bread from Cannibal Creek Bakehouse, and was immediately rewarded with a beaming smile. A milkshake caravan advertises the use of (and sale of) the locally-produced Gippsland Jersey Milk (2L for $4.50), and reading about this farmer-owned, up-and-coming milk producer gave a deep urge to buy a bottle in solidarity of their ideals.
Even as the dark clouds in the sky occasionally threatened to send a burst of shower down onto the market grounds, the market continued to draw a crowd. A guitarist serenaded the passers-by as we weaved in and out through the market-goers, and the occasional Christmas advertisement stood in stark contrast to the Halloween decorations of nearby stalls. 
The concurrent craft fair running alongside the farmer market showcases calligraphy, garden decorations and various knick-knacks - TY's visiting friend was particularly intrigued by the gemstone stall, and R and J were similarly tickled by the collection of fossils. A gathering of people tapping on drums in the corner of the fair provided a jolly tempo to the atmosphere. All in all, the gathering of hobbyists, farmers and musicians transformed the park of Warragul into a vibrant piece of real estate once a month. 


Warragul Farmers' Market
Civic Park, Warragul. 
Opening hours 830-1pm, 2P street parking available. 

We didn't end up going to the Vintage Craft Park, but they're only a six minutes drive away over at Copelands Rd and showcases functional vintage farm equipment and recreational steam trains available for a ride. Picnic and BBQ facilities are available on-site too. 

Vintage Craft Park
Copelands Rd, Warragul VIC 3820, Australia

                                                                         ***********
Moyarra is about an hour's drive away from Warragul. Gently lush peaks of hills sat in the horizon on the drive over, stretched out as far as the eye can see. Herds of cows and sheep peacefully graze by the side of the hills, blissfully unaware of the grey clouds gathering overhead. 
Although the cows turned to give us a suspicious look as we rolled to a stop in front of them. In dusk, all anyone can see will be their skull-like features. Just in time for Halloween!
J's powerful BMW engine made better time on the hills than mine, but we eventually reached the cheese farm just in time for a spot of lunch at the picturesque Prom Country Cheese Farm


Ploughman's Platter ($30)

The Local Platter ($45)
There were several tasting platters to choose from, and served alongside cuts of meat from a nearby organic pork farm.  Because it's easy to get overwhelmed by the variety on the platter, each platter comes with tasting notes and a suggestion on which cheeses to start off from. The options on the platter may vary from day-to-day, depending on what is available, but the excellent quality of the cheeses we had, some from cows, others from sheep or goats, is a testament to their craft. I particularly enjoyed their Cheviot, a hard cheese made from sheep milk with a sharp, mature undertone. The Merricks Mist is a cow's cheese with a soft, creamy, melting centre, and was a favourite of J and R. Blue cheese aficionados, like TY's friend, would adore the Venus Blue, their signature, multi-award, blue mould sheep cheese that swept the 2017 Australian Grand Dairy Awards and took home the trophy in "The Best of Goat's, Sheep's and Buffalo milk cheese" category.  
During the meal, local craft beers are available on request. And post-meal? Feel free to walk out to the back and entertain yourself with the puppy sheepdog-in-training and the lambs, which are quick to nuzzle an outstretched hand and chew playfully on your knuckles.
Prom Country Cheese Farm 
Open weekends and holidays 10am-5pm
275 Andersons Inlet Rd, Moyarra VIC 3951
Website: Prom Country Cheese

Milk for the cheese, cold-cuts and olives are sourced from Wattlebank Park FarmGrassvale Farms and Fish Creek Mount of Olives

                                                                         ***********
The town of Loch is 15 minutes from Moyarra, and it may be my new favourite place in Australia. We came for the local Loch Brewery & Distillery, but ended up spending more time than anticipated exploring the idyllic town. 

We were greeted by the friendly matron of the boutique distillery, who sat us in a comfortable corner. During the tasting glasses (3 types of gin, $15), she guided us expertly through her products from the distillery. She spoke at length regarding each step of the distillation process, and highlighted the botanical notes in each of her gin. She even brought out a selection of spices and encouraged us to spot the character of each spice during the tasting.
J and I were the designated drivers and were stuck with the selection from the non-alcoholic sections (the Ginger Beer was excellent!), but it's still nice to see the love and pride in her work.
It is late enough in the year that we really should be clearing our stock of liquor from the cellar, but TY and EJ couldn't resist buying a bottle of Loch Gin Liqeur ($68), where it stands now proudly between the Hendrick's and Four Pillars Gin. 
TY also had the Tasting Paddle (4 glasses of beer) - hand-brewed in the style of traditional English ales. The quality of the brew impressed TY (who normally expresses a preference for hop beers over the traditional dark, malty English brews.) From behind the counter, the matron proudly demonstrated her manual handpump and how the 17th century design of the beer engine worked to dispense ale from their cask ale selection. 
Whiskey is another product that they are in the middle of distilling, although the next batch is only scheduled to have completed aging in March 2018. Keep a lookout for it!

The verdict? Just a couple of hours after we left Loch, and TY is already making plans to return. Just over an hour's drive from Melbourne city, it makes a trip to Loch immensely rewarding, and it's puzzling how little known this brewery is. Remember: when this distillery explode in popularity, you heard it here first... 

Loch Brewery and Distillery 
Opening hours 11am-4pm, streetside parking available
44 Victoria Rd, Loch VIC 3945

                                                                         ***********
Nary a few metres from the brewery's storefront, hidden gems and whimsiness abound its neighboring stores along the street. Yakkity Yak is a handicrafts shop that TY's friend made a beeline for; I entered to find him in an engrossing conversation with the shop-owner about her lovely Tibetan Singing Bowl collection and their application on meditation. Not far down the street is The Rustic Cacao Factory, which brews a mean pot of rich, full-flavored hot chocolate. Diana, the Spanish-speaking owner, was busying around the store, but between rushing from one place to another, came by to engage us in conversation about her selection of cacao beans. She sources her beans from Peru, and proudly showed us a jar of cacao nibs and snapped open her vanilla pods for us to have a whiff.  
Hot chocolate aside, the cafe also carries a selection of house-made artisan jams and peanut butter. I didn't help myself to the samples of the jams, but I did helped myself to a small scoop of their peanut butter, which was smooth and intensely-flavoured. Move over Skippy! The Croatian store-hand also recommended the chilli peanut butter, and the spiciness kicked in at the after-taste. I wasn't in the market for a spicy challenge every morning for breakfast, but the taste and texture of the chilli peanut butter was remarkable. Another big feature of the store products is their chilli section: they make a range of chilli sauces from a mild one to a potent brew comprising of the top five spiciest substance on earth. I didn't do a taste-test and I'll take their word for it. For people interested in Croatian or Spanish cuisine, they'll be starting a series of cooking classes, so watch this space. 

                                           ***************   UPDATE   ***************
It's barely been a fortnight and already we returned to Loch. Them gins ain't going to drink themselves... The lady-owner of Loch Distillery remembered us (!) and we settled in at our usual table. (Surely, I get to call it our usual table by now?) The distillery encourages customers to bring local produces into the store to pair with their alcohols, and the matron personally recommended Bassine Specialty Cheeses and Prom Country Cheese Farm (as above). Howler Brewing Company in Lang Lang was also recommended. We couldn't make the opening hours for most of these places, but TY's sharp eyes caught a sign for Caldermeade Farm & Cafe on the drive to Loch, and we made a stopover for hot food. It does a pretty brisk business even to the last hour, and evidently, even the Chinese leader Xi Jinping visited the farm in 2010 and gifted a set of hand-painted silk scrolls. The food wasn't much to write home about, but I loved loved loved the milk they were selling (Coach House Dairy, 2L for $3). We carted it for an hour back to Melbourne, and no regrets. Stalking their webpage, it seems that the milk recently bagged Silver at the 2017 Sydney Royal Cheese and Dairy Show too. 

Caldermeade Farm & Cafe
4385 S Gippsland Hwy, Caldermeade VIC 3984
Opening hours 9-5 daily


03 November 2017

Kahlua Ice Cream Recipe (Ben & Jerry's)

November 03, 2017 0
Kahlua Ice Cream Recipe (Ben & Jerry's)
Spring had officially arrived since September, but the weather here remains ever so flighty. Warm nights spread through the city of Melbourne here and again, breaking the remnants of the long chill of winter. The window-rattling howls of winter winds had vanished, replaced by balmy gusts of spring that gently tease at the edges of our scarves - a necessity in even in the crisp of the mid-spring morning air. 

Slowly but surely, Melbourne marches inexorably towards summer. As the temperature soars, I've dusted off my ice cream machine and brought it back to life, where it now residing happily in the pantry, churning out small batches of ice cream. The pitfall of constantly making ice cream is the egg whites in my freezer that builds up insidiously. At last count, I have about eight frozen egg whites, all awaiting a future attempt at a Munavalgekook or macaroon recipe. Luckily, this Kahlua recipe from Ben & Jerry's Ice Cream Recipe book charmingly uses the entire egg, which mitigates the stress of having to add yet another egg white to my collection. It's a simple recipe, and thanks to the alcoholic content, provides a smooth and silky texture not unlike soft serve even after overnight in the freezer. Highly recommended.    


Kahlua Ice Cream Recipe 
INGREDIENTS 1 large egg
40g sugar - original 70g,
235g (1 cup) heavy cream
120g (1/2 cup) milk
140g (1/2 cup) Kahlua

STEPS1. In a large bowl, whisk the egg, sugar, heavy cream and milk together until combined.
2. Add the kahlua and whisk to combine. 
3. Chill the mixture thoroughly, then churn in an ice cream machine as per the manufacturer's instructions. 

NOTE
The original sugar quantity was 70g, but in the absence of a contrasting bitterness from chocolate fudge (as from the original recipe), 70g was just too sweet. I revised the sugar quantity to 40g to compensate. 


VARIATIONS
Kahlua-Ameretto 
Substitute 1/4 cup of kahlua for 1/4 cup ameretto

Kahlua Almond Fudge

Do the recipe as per above. 5 minutes before the ice cream is done in the ice cream machine, add the 3/4 cups roasted whole almonds (pre-chilled in fridge, salted or unsalted.)  When the ice cream is ready, layer the ice cream in a container with 1 cup of fudge sauce (cold).  Work fast to prevent the fudge from mixing with the melted ice cream and becoming chocolate ice cream!

30 October 2017

Pumpkin Pie Recipe

October 30, 2017 0
Pumpkin Pie Recipe
This is my first forage into pies this year, and just in time for Halloween too! In previous years, I've made Chez Panisse's Almond Tarts before, as well as this easy French Tart Dough Recipe, both of which make an easy pie dough that don't require a rolling pin. (Luckily too, because I don't have one.) I thought in the spirit of Halloween, I should tackle something that had been scaring me off for the longest time: pie dough that requires a rolling pin.  

Whenever I think of rolling pie dough, it's the combination of many small factors jumbling in my head, which makes my head hurt and my heart quop. I don't have a rolling pin, I don't have a clean surface for rolling dough, I don't know the sweet spot amount of flour to sprinkle to make the equipment non-stick while rolling without creating a stiff dough... (Usually, by this stage, I'd withdrawn my hand from the flour cupboard and would go for the gin instead.) 
The weather has been warming up of late, but a recent cool spell during this Halloween period made cutting chilled butter into flour easy as ... well, pie. The recipe does require a little prepping effort, and I roasted pumpkins to make puree a day before, as well as made the pie dough prior. Everything else was a breeze thereafter. I rolled the dough out with a thermos flask in no time, and a handheld immersion blender made quick work of the pie filling. 

I harbored a little apprehension as I cut a wedge of pie for myself; it was my first time making this after all. But as I cooked the pie filling, the strong smell of the spices carry the promise of holiday, and the addition of brandy released a cathartic warmth throughout the kitchen. The worry was for naught: the pie filling was like a rich spice-laden custard, and perfect for Halloween. 
Pic by R

Pic by R

Pumpkin Pie Recipe

Makes one 9-inch (23cm) pie
Adapted from David Lebovitz's recipe
The original recipe comes with instructions for a majestic swooping marshmallow topping, which I was going to attempt until my handheld mixer inexplicably broke. David suggests that canned pumpkin can be used to cut down the work involved, but making pumpkin puree is really easy: bake the quartered pumpkin at 170C until soft enough until a fork goes in without resistance, then scrap out and mash. 

INGREDIENTS
Pie Crust
175g (1 1/4 cups) flour
2 teaspoons sugar
1/4 teaspoon salt
115g (4 ounces) unsalted butter, chilled and cubed
3-4 tablespoons ice water

Pumpkin Pie Filling
425g (1 3/4 cups) pumpkin or butternut squash puree
250ml (1 cup) heavy cream
125ml (1/2 cup) milk
3 eggs, at room temperature
160g (3/4 cups) packed light brown sugar
1 teaspoon ground ginger
2 teaspoon ground cinnamon
1/4 teaspoon ground cloves
1/4 teaspoon ground black pepper
Pinch of salt
1/4 teaspoon grated nutmeg
1/2 teaspoon vanilla extract
2 tablespoon Cognac or brandy

STEPS
Pie Dough
1. Mix flour, sugar, and salt. Add chilled butter and mix into the flour mixture until the butter is in small pieces the size of a pea. (Use a stand mixer fitted with the paddle attachment, or a food processor, or by hand as you rub the flour into the butter with your finger tips, or a pastry blender).

2. Add 3 tablespoons of ice water and mix until the dough comes together. Add more water as necessary. Turn the dough out onto a clean flat surface and give it a few turns with your hands. Shape it into a disc, wrap in cling wrap and refrigerate for at least an hour. As the dough is refrigerating, prepare the pumpkin filling (see below). 

3. Between two pieces of baking paper (or lightly flour the table and the rolling pin), roll out the dough until about 33cm (13 inches) in diameter. Dust off the excess flour and transfer it to a pie plate. Crimp the excess dough from the rim of the pie plate, and prick the bottom of the pie dough with the tines of a fork. 

4. Preheat the oven to 190C (375F).  Line the inside of the pie dough with aluminum foil and fill halfway with beans, rice, or pie weights. Bake for about 15-20 minutes until the edges are a golden brown, then lift out the aluminium foil with the weights, and bake until the inside is nicely browned, about another 5 to 8 minutes. Remove from the oven and turn the temperature down to 180C (350F).

Pie Filling
1.Blend all ingredients together, either in a blender or with an immersion mixer in a pot.

2. Gently warm the filling over a small fire, scrapping the bottom constantly, just until it’s warm to the touch. Do not overheat as eggs scramble around 60C (140F). Remove from fire. 

3. Reheat gently just as the pie crust finishes baking. 
  
Putting Crust and Filling Together

1. Ladle the warm filling into the prebaked pie shell. Bake at 180C for 40-50 minutes, just until when you jiggle the pie, the centre of the pie has just set and is only slightly jiggly. Let pie cool completely on wire rack. Overbaking would result in a cracked pie surface as the pie cools. 

NOTE
Once cool, the pie can be chilled (for up to two days), or left at room temperature for serving.