

Hello friends! It's a couple of months into the new year, and looking back at 2019, it's a year with much to be thankful for, and I could think of no better one to cap off the decade.
There's a lot to be grateful about, and at the very top of my list would be the wonderful folks in my life. These people make life fun. And the colleagues I've met, who made working more enjoyable than I thought possible. Also, I developed a new newfound obsession with Dungeons and Dragons, which is quite enjoyable indeed (although to everybody else who don't play - their eyes kind-of glaze over when I describe the game. But I won't hold their bad tastes against them...)
One of the biggest thing that sparked joy this year was my trip to California, where amongst all the sightseeing, my sister and I squeezed in perfect moments of dessert-making in the quiet mornings before her kids return from school. One outstanding recipe was this cheesecake, courtesy of Stella Park. To be honest, her article on cake pans won me over already, namely, how springform pans are substandard pieces of kitchen equipment. Restaurant cheesecakes are gorgeous pieces of work: tall, majestic and towering, while springform pans, with its shallow built, createsunimpressive squat-looking cheesecake slices. Plus, the deep grooves of springform pans make the extra cleaning a pain-in-the-you-know-where. I didn't think someone out there shares my sentiments until, well, I came across her article. She recommends a loose-bottom cake pan instead.
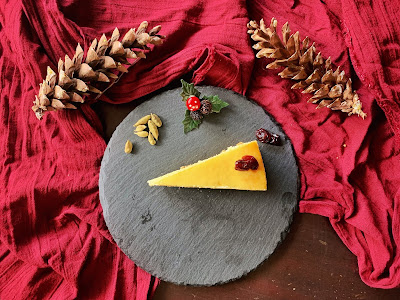
Her brownie recipe displaced my old favourite brownie recipe, and this is another winning recipe. I returned to this recipe again and again over the next few months. I've made it for Christmas (as the festive pictures show), and again for the New Year's, and increasingly, for no particular occasions other than satiating my cheesecake cravings. I usually find most Western-style cheesecakes too sweet and sit too heavily in the stomach. Coming across this recipe completely changed my perspective. It was a breath of fresh air. It's simply out-of-this-world, and I'll be hard-pressed to find a cheesecake that is better than this.

Stella Park's New York Cheesecake
Adapted from Serious Eats
Makes a 8-inch wide, 3-inch tall cheesecake
I'd made a few tweaks to the original recipe (mostly because I didn't have the cash to spring for a 4-inch tall cheesecake pan, and ended up with this budget beauty, which I'd come to love.) The original recipe's goat cheese profile was also a little hefty for me. Depending on the goat cheese available in your region, you may end up scaling up or down to personal preference.
Ingredients
250g graham biscuit
100g unsalted butter, melted
110g goat cheese
1/2 tbsp lemon juice
1/2 tbsp vanilla
1/16 tsp salt
1/16 tsp orange blossom water (optional)
180g granulated sugar (or toasted sugar if you can swing it)
3 large eggs
95g heavy cream
Steps1.
If using a two-piece pan, wrap the bottom piece in foil. Lightly grease the bottom and the sides.
2.
Bash the graham biscuits into fine crumbs, and drizzle in the melted butter and salt. Mix until well combined. Using a silicone spatula or your hands, press the crumbs into a flat layer along the bottom of the pan.
3.
Preheat the oven to 230°C and set the oven rack to the middle.
4.
In a large bowl, beat cream cheese, goat cheese, lemon juice, vanilla extract, salt, and orange flower water (if using) on low until roughly combined, and then increase to medium and continue until the mixture is perfectly smooth (about 5 minutes.) Reduce speed to medium-low, add the sugar all at once. Mix only until well combined.
5.
Place a single-mesh strainer over the bowl, then add the eggs, whisking in the strainer until they pass through. Discard any clots of chalazae that remain in the sieve. Resume mixing on low until well combined.
6.
In a saucepan, bring the cream to a full boil. While mixing the cream cheese mixture at low speed, add the hot cream in a steady stream. This warms the batter, which helps release any air pockets introduced in mixing while reducing the overall bake time. Mix for a few seconds more and then stop.
7.
Pour the cheesecake batter into the cake pan. Gently rap the cake pan against a cloth set on a table to bring any air bubbles to the surface, and then pop the air bubbles with a spoon or butter knife.
8. Bake at 230°C until the edges of the cheesecake are puffed and dry to the touch, about 15-18 minutes, rotating the baking sheet midway to ensure even browning. Browning leads to a deeper, richer cheesecake. (For comparison's sake, the cheesecake in the pictures wasn't sufficiently browned.)
9.
Turn off the oven, crack open the door, and let it stand ajar 10 minutes. Then close the door and resume baking at 120°C for 30-40 minutes, until the outer edge of the cheesecake feels firm but the centre is still wobbly. (This wobbly zone should be no more than 3-inches wide.)
10.
Remove from the oven and let the cheesecake cool for 15 minutes, then run a thin knife around the sides to loosen the cheesecake from the sides (this helps the cake settle evenly as it cools). Continue letting it cool at room temperature for at least 1 hour before covering it to refrigerate until cold to the core, at least 12 hours.
Notes:
Excess cheesecake batter can be stored for up to one week. After Step 6, transfer the batter into an airtight container and refrigerating it. Bring cold batter to room temperature before baking.


