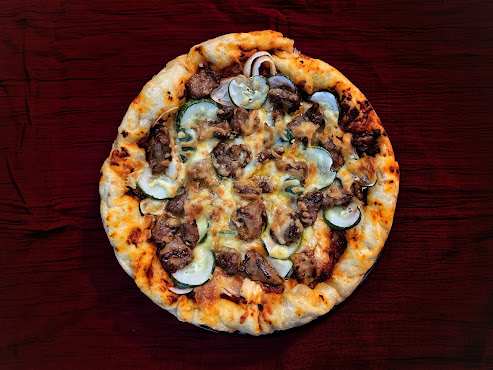

Despite being over a decade when I stepped food in Italy, I still remember one of the local pizzeria that we stopped in. In that pizzeria, I had a slice of pizza that defined the gold standard for thick-crust pizza. I was frozen from a night-time wintertime walk to the diner, running on a body clock that was decidedly not dinner-time, and more than a tad grouchy after a walk in subzero temperatures. But the pizza was so astonishing, my mood did a 180 degrees turn. The pizza had a crisp base fired to a gorgeous golden brown, and crunches delightfully with every bite. It was something of a revelation.
The restaurant cemented a special place in my heart for another reason: I gave a shock to the owner by telling him that I’d never had an espresso before. (What? It was my first night in Italy...) He was stunned, and despite being close to midnight, he made a shot of espresso for me on the house, just so I could no longer make that claim.
The event was so memorable, so much so that when I made Kenji’s garlic focaccia recipe, the crispiness of the base brought back the memory of their formidable pizzas. And one afternoon when I finally gave it a go, it was as good as I had dreamt it would be.

Recipe for Thin Crust Pizza Recipe for the Ordinary Oven
Recipe for Pizza on a Grill
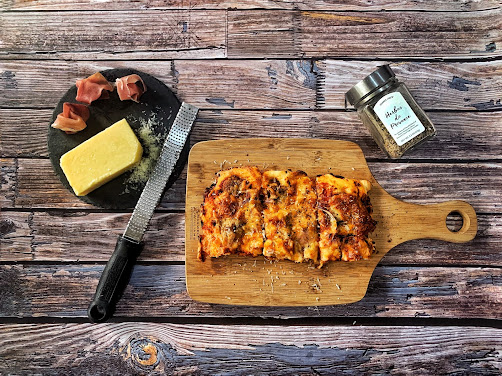
Thick Crust Pizza Recipe
Adapted from Garlic Focaccia at Serious Eats
If you don't have a cast-iron skillet (I know I don't...), you can get great results with stainless steel. I use a 11" stainless steel baking pan, which develops a crisper crust than using non-stick pans. I usually omit the garlic butter for ease of cooking, but layering this with tomato puree as a sauce base would be rather decadent.
Last updated on May 26
INGREDIENTS
Pizza Sauce
1 whole head garlic
1 tablespoon (15ml) extra-virgin olive oil
Pizza Base
375g all-purpose or bread flour
11g salt
3g instant yeast
245g water
3 tablespoons extra-virgin olive oil
Adjust oven rack to center position and preheat oven to 350°F (180°C).
Break a head of the garlic apart slightly. On a sheet of aluminum foil, drizzle the garlic with 1 tablespoon (15ml) olive oil and sprinkle with salt. Leave each garlic clove uncut: roasted whole garlic cloves are sweet and fragrant, which slicing into the garlic cloves, even a little, will result in a harsh and pungent garlicky taste. Wrap tightly with foil and roast for about an hour, until garlic is completely tender. Peel the roasted garlic cloves and discard the skin. Mash the garlic flesh and combine with tomato paste. Add oregano or thyme to taste.
For the Pizza Base
In a large bowl, mix flour, salt, yeast and water until there are no pockets of dry ingredients. (The bowl should be large enough to accommodate the dough proofing, which can triple in size.)
Cover bowl with plastic wrap, then allow dough to rest at room temperature for at least 8 hours, and up to 24 hours. In a warm environment, the dough may overproof near the end of that range. Dough should rise dramatically and fill bowl.
Additional Notes
It’s fine if your oven is unable to toggle the top and bottom heating coils on and off. The base will likely remain underdone when the top has finished cooking, but you can just finish the pizza on the stove. I would lift the undercooked bottom off the pan, drizzle a generous amount of olive oil into the pan to help the bottom crisp, and cook over medium heat to desired brownness.
You may also get a crispier bottom by first cooking the pizza dough in the pizza pan over your stove for a couple of minutes, before baking in the oven (until the top is done), then finish it back over the stove (until the base gets to the level of crispiness that you want). It’s a bit more work, but it may get better results.