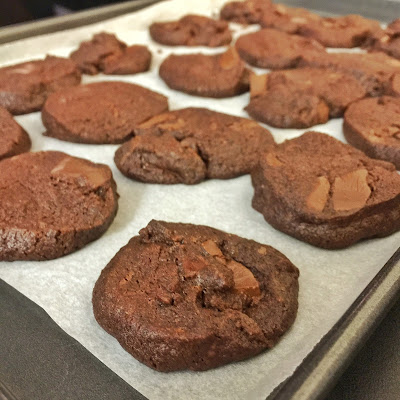
These are my favourite-est soft cookies in the world. I'm not usually a fan of soft cookies - gimme some crunchy sides - but these ones won me around with their fine, sandy texture on the edges and a softer interior. They're probably among my friends' favourite recipes as well, and I have to (figuratively) slap their hands out of my dwindling cookie jar.
This is my third attempt making chocolate sables (aka French shortbreads) from Pierre Hermé's repertoire - word has it Hermé created this for a Paris-based restaurant named Korova. I had my first go in Singapore, which was a big hit with the family. The second was in Melbourne, but something about the dough was off. It was dry and crumbling, not unlike sand, and after I baked it, was pretty inedible. I thought I must have messed up (again!), but it seems that Dorie Greenspan ran into this problem from time to time too, and she attributed it to using natural cocoa powder instead of Dutch-processed (link as above - and she gave a selection of 'safe' cocoa to use). For more information about Dutch-processed vs Natural cocoa powder, here's a useful link.
 |
| Picture by J |
There ya go! Tips from two reputable sources gathered for you, so you don't have to scroll through the entire internet trawling for tips. Don't let all these worst-case scenarios discourage you though. I succeeded on my first try without these tips, so there's no reason anyone else wouldn't either.
 |
| Pic by J |
Korova Cookies
Recipe created by Pierre HerméPublished in Baking: From My Home to Yours, by Dorie Greenspan
Recipe taken from Food52
Makes about 36 cookies
Ingredients
175g (1 1/4 cups) all-purpose flour
30g (1/3 cup) unsweetened cocoa powder, preferably dutch-processed
1/2 teaspoon baking soda
150g unsalted butter, room temperature
120g (2/3 cup) packed light brown sugar
50g (1/4 cup) granulated sugar
1/2 tsp fleur del sel (or 1/4 tsp fine sea salt)
1 tsp pure vanilla extract
120g bittersweet chocolate, coarsely chopped (no larger than 1/3 inch). (The original amount was 150g, but I had trouble slicing the cookie dough with so many chunks of chocolate. And when baked, the cookies was flimsy and there's a mild risk of the cookie folding over when you hold it up.)
Steps
1) Sift flour, cocoa powder and baking soda together. Set aside.
2) Beat the butter on medium speed until soft and creamy, if using an electric mixer. Add both sugars, salt and vanilla extract and beat for another 2 more minutes.
3) Pour in the flour mixture and combine with a spatula (or your hands! I did.) For the best texture, work the dough as little as possible once the flour is added, just until you can't see any traces of flour left. Mix in the chocolate pieces.
4) Take half the dough and shape into logs about 1 1/2 inches in diameter. Wrap the logs in baking paper and refrigerate them for at least 3 hours.
5) Center a rack in the oven and preheat the oven to 165C. Line two baking sheets with parchment or silicone mats. (Bonus tip! Be eco-friendly: use the baking paper that you wrapped the logs in. Bonus bonus tip: feel free to brag about it on the internet.)
6) Using a sharp knife, slice the logs into rounds, about 1/2 inch thick. If the slices break apart, just squeeze the pieces together. Arrange the rounds on the baking sheets, leaving about 1 inch between them.
7) Bake one sheet at a time for 12 minutes — they won't look done, nor will they be firm. If you poke one with your finger, it's going to be really soft - but that's just how they are, and they'll firm up as they cool. Transfer the baking sheet to a cooling rack and let the cookies rest. Serve slightly warm or at room temperature.
Notes:
The dough can be refrigerated for up to 3 days or frozen for up to 2 months. If the dough is frozen, I suggest leaving it out on the counter or in the fridge to thaw before you start cutting. Food52's version mentioned that the frozen logs don't need to be defrosted - "just slice the logs into cookies and bake the cookies 1 minute longer", but I had no luck trying to slice the frozen logs, which also tended to crumble more.
As Food52 suggested, if you are combining the flour with the butter with an electric whisk, drape a kitchen towel over the stand mixer to protect yourself and your kitchen from flying flour and pulse the mixer at low speed about 5 times, a second or two each time. Take a peek — if there is still a lot of flour on the surface of the dough, pulse a couple of times more; if not, remove the towel. Continuing at low speed, mix for about 30 seconds more.


No comments:
Post a Comment