Chik's Crib

18 October 2019

Karen's Chocolate Mousse Domes

October 18, 2019 0
Karen's Chocolate Mousse Domes

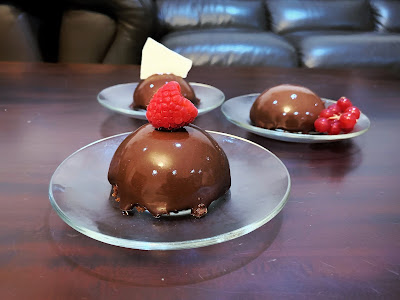
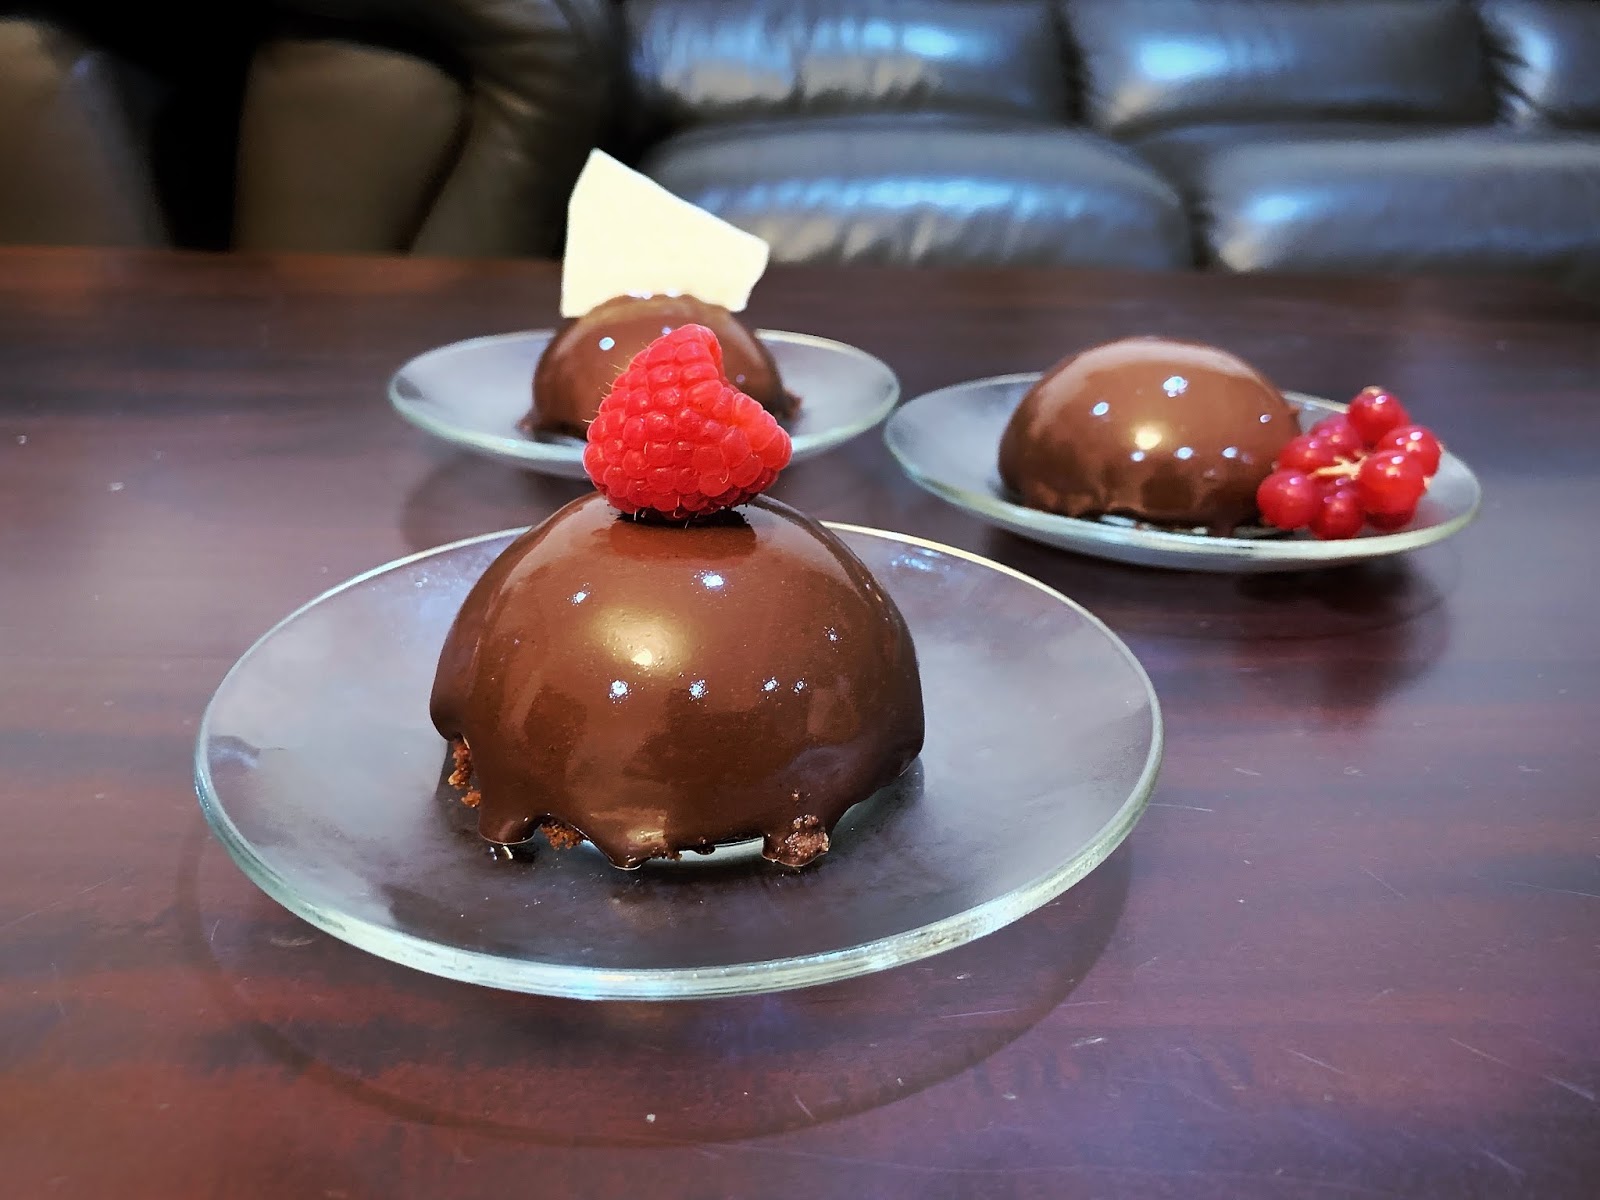
Years ago, back when I was studying in university and all of us were staying on campus, my friend Karen brought a few of these dainty confectioneries to us, and asked us what we thought about them. It was a delicate chocolate mousse, coated with a shiny layer of glaze and sitting atop a crunchy biscuit base. I dug a spoon into the dessert, and peeping out of the chocolate mousse, was an inner filling of caramelised milk, or dulce de leche. It was simply exquisite. We could scarcely believe that they were home-made. Within a few bites, the plates were swept clean, and not a crumb remained. 

It's been a few years since. Despite the intervening years, I still remember her mousse cakes, which had been singularly the most impressive dessert I had seen a home baker made. And I hung out often with a pretty large group of baking enthusiasts. I'd seen similar confectioneries in various fancy cafes, usually little showstoppers named after the cafe. This recipe was so spectacular, I finally gave in and bought some of those silicone molds just so I could make these mousse cakes. 


Karen was generous enough to share her recipe, and I started tinkering with various components of the recipe over the last few months, starting from when I visited my sister in California for a holiday, and continuing on when I returned to Singapore. I think these pictures were from batches number six or seven? I'd changed a couple of things, like substituting the sweet dulce de leche filling for a tart raspberry filling, and various means of getting the glaze to be a little more reflective. I think I tired out the voracious chocolate appetites of even my family (on both continents) at the end of it, but it was well worth the efforts. 


A common theme in my baking experience is to jerry-rig some sort of baking equipment together, and over here, for example, is my niece's Hello Kitty cookie cutter in lieu of a circular cookie cutter for the chocolate base.  Which actually did a pretty good job. 


Karen's Chocolate Mousse Domes
This is a four-part assemble, and is more complicated than the usual recipes that I post up. However, if you stick with it, it's well worth the effort. I've listed the parts in the order of which they should be done, to minimise waiting time. Otherwise, it could be spread out over multiple days. This recipe requires a roughly-circular cookie cutter, and silicone molds. Silicone molds can be picked up online or in specialty baking stores. The portions here has been adjusted to make 12 mousse domes. 


RASPBERRY FILLING
Fills 12 mousse

INGREDIENTS
40g granulated sugar
1/8 tablespoon lemon juice
40ml water
A dash (1/16 tsp) vanilla extract
75g frozen raspberries 

STEPS

1. In a medium saucepan set over medium heat, combine everything and cook until mixture thickens into an almost-jam-like consistency. Remove from heat and let cool completely. Chill the filling before use.

CHOCOLATE MOUSSE 
Makes 12 domes (2.5" each)

INGREDIENTS
4.5g (1.5 tsp) of gelatin
100g dark chocolate, about 70% cacao
20g brown sugar 
1 tsp vanilla essence
50ml + 250ml heavy cream

STEPS

1. Stir the gelatin into 30ml of cold water. Allow to sit for 5-10 minutes. 
 
2. In a small saucepan, set 50ml of heavy cream and the chocolate over the lowest possible heat, stirring constantly, until the chocolate has fully melted. Remove from heat. Add brown sugar, and vanilla essence. Allow the mixture to cool, and then stir in the gelatin. 

3. Whip the remaining 250ml heavy cream to soft peaks, and fold into chocolate mixture until just combined. 

4. Scoop the mousse into the dome molds, leaving about 1/2cm of space at the very top. Create a slight well in the middle of the chocolate mousse, to make space for the raspberry filling.  

5. Add a teaspoon of the raspberry filling (as above) into the mousse. Smoothen out the surface of the mousse if you can, but it's no great deal not to. Place the mousse in the freezer while you make the chocolate biscuit base (below). You may find it helpful to slide a cutting board under the flexible silicone mold for structural support.

CHOCOLATE BISCUIT BASE
Makes enough for 12 mousse cakes. Digestive biscuit is widely available, though I’m planning to try using feuilletine in my future batches. 

INGREDIENTS
150g digestive biscuit
50g choc
50g butter

STEPS
1. 
Pound the digestive biscuit into small even crumbs. I get best results with a mortar and pestle, but I mostly make do with a rolling pin or the flat surface of a kitchen hammer. If your digestive biscuits are a little stale (it happens), it helps to  toast the biscuits at 180C for a couple of minutes before pounding them. Set the crushed biscuits aside. 

2. In a medium-sized saucepan, melt butter over the lowest heat setting over a stove, and then add chocolate and stir constantly, until the chocolate just melts and combines with the butter. Remove from heat and mix the crushed biscuits with the chocolate mixture.

3. Remove the silicone molds from the freezer. Fill up each dome with this chocolate-biscuit mix, compressing and leveling the crushed biscuits as you go along. Return to freezer and let the cakes freeze thoroughly, at least for half a day.  
 
Update (2025): I previously advocated to bake this chocolate-biscuit layer in circular shapes before combining with the mousse, but it wasn't necessary after all. In fact, it tastes better without baking.

CHOCOLATE MIRROR GLAZE
Makes enough for 12 mousse cakes
Adapted from Chef Iso

INGREDIENTS
5.7 grams powdered gelatin 

30ml cold water
60 grams water 
90 grams sugar 
60 grams condensed milk 
15 grams of cocoa powder
105 grams dark chocolate
1/2 tsp vanilla extract

STEPS
1. Bloom the gelatin in cold water by stirring them together thoroughly. It should be a thick slurry.

2. Over medium heat in a saucepan, combine water, sugar, and condensed milk, and let it come to a boil. Remove from heat and stir in the vanilla. When it has cooled a little, add in the gelatin and stir until it is fully dissolved.

3. Place the chocolate and cocoa powder in a large bowl and pour the hot liquid over it. Let the mixture sit for a few minutes, then gently stir until the chocolate is fully melted. Using a handheld blender (alternatively, you may pour into a blender), process until the glaze is homogenous mixture. Be careful not to introduce too many bubbles since every minor imperfection will show on the surface. 

4. Strain the glacage through a sieve to remove any stray particles and air bubbles. 

5. Let the glacage cool for about 10-15 mins. If using a thermometer, aim to get it about 32°C, which is the optimal temperature to pour over your frozen desserts. Set a metal rack over a plate or bowl, and gently pour the glaze over the desserts. The excess glaze that drips off the dessert can be reused, after straining it through a sieve to filter out stray crumbs. 

6. Leftover glaze can be stored indefinitely like this. If otherwise left in a well-sealed tupperware in the fridge, it is best to use it up within 3-5 days. To warm up the glaze in future recipes, I place a required amount in a small metal container, and submerge the container in a larger vessel filled with boiling water. Stir gently, as the glaze is heated up by the hot water and melts into a pourable consistency. 

Serving
Once glazed, transfer the domes to the fridge and allow to defrost fully, about 3 hours in the fridge or faster at room temperature. Once defrosted, the biscuit base will start to soften, and is best when consumed within a day. 

Variation
8-inch cake 
The recipe can be adapted for an 8-inch cake. Build the biscuit base in a cake pan with a removable base. Cover and freeze. Subsequently, add the raspberry layer and return to freezer. Then add the mousse, and return to the freezer. Finally, loosen and release the cake from the walls (you may find using a cloth dipped in near boiling water useful to warm up the side of the cake pan to aid the release of the cake). Glaze the cake and top with chopped nuts or cacao nibs. Let thaw in the fridge several hours prior to serving. 

Cream substitute
When you're running low on cream, you can substitute some parts of it with full cream milk in a pinch. Under the CHOCOLATE MOUSSE portion, use milk instead of cream to melt the chocolate in. The less cream you use, the icier the final product will be. You'll still need about 200-250g cream for this recipe (to whip to soft peaks).   

11 October 2019

Roasted Strawberry Ice Cream Recipe

October 11, 2019 0
Roasted Strawberry Ice Cream Recipe

We may have been a little overzealous snapping up all the berries that are on sale, but could you blame us? It's the end of summer and the supermarket was overflowing with fresh berries. We heaped boxes of of blueberries and raspberries into our cart, and just when we were about to leave, we couldn't resist buying these sweet-smelling strawberries. 


There was many of us, and we (my nieces) ate as much as we physically could. But 3 kilos of strawberries is still hard to plow through, and so just when the final box was starting to get a little soft, I decided to roast the strawberry and make some ice cream. 


 We had visited the Original Farmers Market in LA on the previous week, and came back with a particularly impressive bottle of apple balsamic vinegar from Temecula Olive Oil Company, which I drizzled over the strawberries. Because of the young 'uns at our dinner table, we stuck to the conservative side of ice cream making, and omitted the more adventurous miso flavour found in the original recipe, and used a quick squeeze of lemon to balance the sweetness.


The strawberry ice cream was brightly flavoured, and is so creamy, it's scoopable straight out of the freezer. It was the creamiest ice cream I'd had! Unlike the blueberries ice cream which we tried earlier in the month, where the blueberries were blended, we love how the chunks of macerated strawberries were mixed in with the ice cream. 


Roasted Strawberry Ice Cream 

Original Recipe from David Lebovitz

INGREDIENTS
For the roasted strawberries:
1 pound (450g) strawberries
3 tablespoons golden syrup, maple syrup, or light-flavored honey
1/2 teaspoon balsamic vinegar
a few turns of black pepper

For the ice cream custard:

1 3/4 cups (430ml) heavy cream
1 cup (250ml) whole milk
1/2 cup (100g) sugar
5 large egg yolks (4 jumbo egg yolks*)
1/4 teaspoon vanilla extract
A few drops of fresh lemon juice

STEPS

To make the roasted strawberries:
1. Preheat the oven to 375ºF (190ºC).

2. Destem the strawberries and cut them in quarters. Mix with golden syrup, balsamic vinegar, and black pepper, and arrange them in a single-layer in a wide shallow baking dish with high sides. 


3. Roast the berries on the upper rack of the oven, stirring once or twice during roasting, until they are soft and the juices have thickened, about 60 - 90 minutes. Remove from the oven and transfer to a small bowl. 
(Taste and adjust the sweetness with caster sugar or more honey, if your strawberries are not sweet.) Let cool to room temperature, and then refrigerate. These roasted strawberries can be kept up to three days in the fridge. 

To make the ice cream custard

4. Pour the cream into a 2L bowl, and then place the bowl in an ice-bath. Set a strainer over the inner bowl over the cream. 

5. In a separate bowl, whisk the egg yolks together. In a saucepan, heat the milk and sugar. 

6. Gradually pour about half a cup of warmed milk into the yolks, whisking as you pour. This tempers the eggs and prevents them from scrambling. 


7. Scrape the warmed yolks and milk back into the saucepan. Cook over low heat, stirring constantly as you do, until the custard thickens enough to coat the spatula. Remove from heat immediately, and strain into the bowl of heavy cream. Stir over the ice until cool. Add the vanilla extract and refrigerate to chill thoroughly, preferably overnight.


8. When ready to complete the ice cream, mix the roasted strawberries with the custard, then stir in the lemon juice. Churn in your ice cream maker according to the manufacturer’s instructions.


*I've noticed that USA large egg yolks are pretty small in comparison to Australia's or Singapore's. If in doubt, the egg yolk from one large egg should be 18g

03 October 2019

Reverse Searing

October 03, 2019 0
Reverse Searing


One of the highlights of living in Melbourne was the Costco, and one of the perks that I'd missed when I left. Costco's celebration of good ol' American excess, with eye-catching prices from fuel to food to liquor. I wish Costco would come to Singapore!

We had a chance to get reacquainted recently, when I visited my sister in California during my holidays. We spent an inordinate amount of hours wandering up and down the aisles and (me) grabbing everything in sight. Despite my enthusiasm for all things Disney, I skipped Disneyland this visit (Costco is my wonderland!). We went a little crazy in the meat section of Costco, but the upside was we had a lot of practice with newfangled cooking methods. 


Kenji from Serious Eats explained the reverse-searing concept in much greater details than I could, but essentially, the traditional process of cooking meat is 'reversed': the meat here is cooked over low heat first, and then seared over high heat. This replicates the effects of sous-vide, and with the additional benefit of the steak having a dry surface when it's subsequently seared on a hot frying pan. Steaks cooked this way are evenly cooked inside, with the cross-section going from the seared surface to an even pink interior, with no overcooked layers (which can be seen as grey-colored band). 


The guideline below is a good way to estimate cooking times in the oven, but a meat thermometer takes the guesswork out of the equation. A ruined steak costs way more than a thermometer, so get one!  With a little prep work, the resultant steaks were as good as any in fancy steakhouses, and at a fraction of the price.

Approximate cooking guidelines - from Serious Eats

Reverse Searing 
Thinly sliced steaks cook too fast in the oven, and for reverse-searing, each steak has to be at least one-and-a-half inches thick.  

EQUIPMENT 
Rimmed baking sheet, which fits in the fridge
Wire rack, to be placed within the baking sheet


STEPS
1. Season your thick-cut steaks with salt and pepper on all sides, and then transfer to the wire rack set set in the baking sheet. Place the set-up uncovered in the fridge overnight, or at least 8 hours. This dries out the exteriors.

2. When ready to cook, preheat the oven between 95 to 135°C (200 - 275°F). The lower you go, the more evenly the meat will cook, though it'll also take longer. Be aware that the timing estimates in the picture above was for 120°C, and that some smaller ovens may not hold temperature consistently below 100°C. 

3. Place the set-up in the oven, and roast until they reach an internal temperature close to the target temperature.

4. Over the highest burner in the stovetop, set a frying pan and add a tablespoon of vegetable oil. As soon as that oil starts smoking, add the steaks along with a tablespoon of butter. It'll take about 45 seconds til the steaks are nicely browned on the first side. Flip the steaks and brown the other side, and then hold the steaks sideways to sear their edges. Serve the steaks immediately, or, if you'd like, let them rest for at most a minute or two.

20 September 2019

Blueberry Ice Cream Recipe

September 20, 2019 0
Blueberry Ice Cream Recipe

I had always been a little leery of making fruit-based ice cream, as I have some trust issues with my ice-cream making capabilities. But also, bearing in mind the prices of berries from where I'm from, a nagging voice in my head keeps reminding me that berries are a little too pricey an ingredient to mess around. I'm a struggling newly grad, y'all. But now that I am currently on a break and visiting my sister in California, I'm making full use out of her ample fridge space, her ovens (plural), her full array of kitchen gizmo, and of course, all the agricultural produce blessed by the California sun. It's smack-dab in the berry season in September, where every grocery chain that we'd been to couldn't offload their boxes of strawberries, blueberries, blackberries and raspberries fast enough. And all these fresh dairy products supplied from within state lines? Simply gorgeous. Which, naturally, we took full advantage of. 

When everything was set and done, we found ourselves with two quarts of a brilliantly-coloured ice cream bursting with blueberry flavour. We managed to cook off excess water content during the process, resulting in an ice cream that was smooth and creamy.  


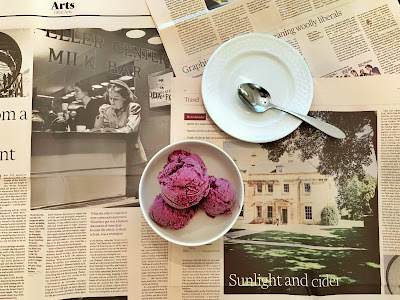
Best of all, I lucked out with the FT I'd been holding onto forever (which I'd snagged from my flight, and had been meaning to read), and its warm hue makes a perfect backdrop. Who says hoarding wouldn't pay off? 


Blueberry Ice Cream Recipe
Adapted from Food
Makes 1 quart
The original recipe makes 2 quarts (almost 2L), which my sister's ice cream machine could accommodate. I had scaled the recipe down to a more manageable single quart, which fits my ice cream machine back home. I hadn't tried Kirsch for myself, but I'd heard it can be paired with fruit-based ice cream instead of vodka. If using kirsch, keep the amount less than 1 tablespoon per litre of ice cream. 

INGREDIENTS
250g (2 cups) fresh blueberries
150g (3/4 cups) sugar
1 tablespoon water
1/2 tsp vanilla 
1/2 tsp cinnamon
360ml (1 1/2 cups) cream
120ml (1/2 cup) milk 
3 tbsp vodka

STEPS
1. In a large saucepan set over medium heat, combine blueberries, sugar and water. Let it come to a boil, and then turn the heat down to a slow simmer. (If using frozen berries, start off with low heat.) Let the mixture simmer for about 5-10 minutes, stirring constantly and squashing the blueberries as you do.  

2. Remove from heat and add vanilla and cinnamon. Stir well. Transfer to a table-top blender (or use a handheld blender). Blend the blueberry mixture well. 

4. Stir in cream, milk and vodka. Cover and refrigerate until well-chilled. 

5. Operate the ice cream machine according to the manufacture's directions.

08 September 2019

Matcha Cheesecake Recipe

September 08, 2019 0
Matcha Cheesecake Recipe

I started making this as a wee young lad back in 2013. I had made numerous tweaks here and there along the way, not all which are appreciated. Some, like layering the cheesecake with sweetened red bean paste, are smashingly successful, while others, like using honey cheerios and ground almonds in lieu of graham crackers, remain best forgotten. 

Layering the cheesecake with red bean paste is an optional step that requires an additional day of prepping ahead, but which is well worth it as it elevates this dessert's appearance - and taste - to something rather extraordinary. 

This cheesecake is a frequent favourite of my sister, for whom I'd make regularly whenever we visit. This year, as I had some vacation time, I jumped at the chance to experience summer in LA and spent a few weeks making the most out of her massive kitchen and her extensive range of kitchen appliances. It's also the peak season for summer fruits, and seeing the prices of cream cheese and other dairy products make my jaw dropped. So this is what acute jealousy feels like... 


Anko (Sweet Red Bean Paste) Recipe
Original recipe from Namiko Chen 
This makes enough to layer one cheesecake. Japanese red bean paste can be either chunky (Tsubuan) or fine (koshian). This recipe makes the chunky ones, and koshian is made by further straining tsubuan through a sieve. 

Ingredients
100g Azuki beans (Not all red beans get mushy, so if in doubt, buy the large ones which are labelled as Japanese Azuki beans) 
Water
80g granulated sugar
Pinch of salt 

Steps 
1) Soak the azuki beans in a bowl of water overnight, about 8 hours. 
2) Discard the water and rinse the azuki beans. Transfer the beans into a pot, and pour room temperature water into the pot until the water comes to about 1-2 inches above the beans. Let the water come to a boil, and then turn off the heat and cover the pot with a lid. Let stand for 5 minutes. 
3) Discard the water, and replace with fresh water; but this time, only pour just enough until the water covers the all the beans. Let the water come to a boil over high heat, then let simmer at a low-medium heat for at least an hour. Stir occasionally and continue to add water at regular intervals to replace water which has been boiled off. The beans are done when they are soft and can be squashed easily. 
4) Turn the heat to high, and add the granulated sugar in three portions, stirring after each addition. Let the mixture continue cooking and thickening, until a line drawn with your spatula exposes the bottom of the pot for 2 seconds. This would take roughly another 45 minutes for the azuki bean paste to thicken. When done, turn off the heat and add salt. Stir well and let the mixture cool. The paste will thicken further as it cools.
5) Let cool completely, and then transfer to a container and refrigerate until well-chilled. They can keep for a week in the fridge, or up to a month in the freezer. 

Cheesecake Base Recipe
Ingredients (for the base) 
250g graham biscuit
100g unsalted butter, melted

Steps (for the base)
1) Crush the graham biscuits with a food processor, or with a plastic bag and the flat end of a hammer (If you're low-tech like me). 
2) Place the crushed graham biscuits in a medium-sized bowl. Drizzle melted butter in and mix well. If the mixture remains dry and crumbly, add more melted butter until it just comes together. 
3) Line the bottom of a cake pan with baking paper. Spread the graham mixture over the base of the cheesecake and press and compact them. Place in the freezer and chill thoroughly. 
4) When the graham layer is completely hard and frozen, spread the azuki paste over the graham, leaving about an inch of azuki-free space along the circumference. Excess azuki paste can be kept in the fridge/freezer, or perhaps turned into koshian and smeared onto serving plates with a slice of cheesecake. 
5) Wrap the outside of the cake pan with aluminium foil to prevent water from the water bath from seeping in afterwards. Place in the freezer until ready to make the matcha filling. 

Matcha Filling Recipe
Original recipe from Allrecipe

Ingredients (for the matcha filling)
450g (2x 8 ounce) cream cheese, softened
125g white sugar 
2 eggs, beaten
2 teaspoon vanilla extract
1 heaping tablespoon matcha powder

Steps (for the matcha filling)
1) Preheat the oven to 175C (350F). 
2) Beat the cream cheese and sugar together on low power until smooth. Add the eggs, vanilla extract. Add in the matcha powder and fold the mixture together until homogenous.   
3) Set a sieve over the cake pan. Pour the matcha mixture through the sieve into the cake pan (over the graham layer and the azuki layer). Rap the cake pan on a towel set over a flat surface, so any air bubbles in the cheesecake mixture can escape. This prevents the cheesecake top from cracking. 
4) Place the cake pan in an oven tray and set a water bath (pour boiling water into the tray surrounding the cake pan.) Bake for about 30-35 minutes, until the sides are set but the centre still wobbles slightly. It is better to err on the side of underbaking, as the cheesecake would continue to cook as it cools. Turn off the oven but leave the cheesecake inside and crack the door of the oven slightly ajar to let the interior of the oven cool gradually. 
5) Chill thoroughly before serving, for at least an hour.