Chik's Crib

09 May 2021

Daytrip to Outback Singapore - A Journey to the West (Well... North-West)

May 09, 2021 0
Daytrip to Outback Singapore - A Journey to the West (Well... North-West)

Traveling out of the country is no longer an option, given the current pandemic restrictions. Over the last year, I've spent plenty of time indoors, occupied with my hobbies of cooking and baking (and blogging!) #noregrets. Though after a year of doing so, a certain someone had complained that we were spending too much time in my kitchen, and after having made several choice comments about how pale I was getting, I finally picked up the hint to plan a date somewhere outside of my house.

North-West Singapore lies an expanse of farmland and wetland reserves. For walking enthusiasts, Sungei Buloh Wetland Reserve is a particularly lovely place to visit in the early morning. Their walking trails take you past forests, mangroves and coastal regions, which are home to regional wildlife. During the migratory season from September to March, shorebirds can also be spotted as they fly in from northern regions to avoid the winter chill. 


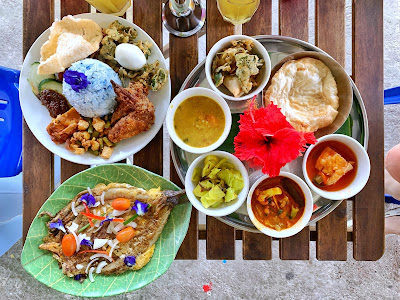
Bollywood Veggies is a place that I've been wanting to go to. Several people had recommended this place to me within a few weeks of one another, which was rather serendipitous. Also, a little scary. Anyway, we reached the café, in time for what I'll say was an early lunch, but the place was so popular, it was already running at full capacity. 


The café occupies a small part of their 10-acre estate, with the remaining land dedicated for growing produce. And it is a marvel to see what they've done with the place. All sorts of tropical plants were growing on small plots side-by-side. Copious amount of butterfly pea vines can be found (and their blue pea flowers can be seen on the food their café serves), and banana groves co-exist with canola plants and fig trees. There are many plants that I'd never heard of, such as a Crystal Fruit Trees. (Online sleuthing deduces taste like a cross between a longan and rambutan.) There's even a paddy field growing rice! Walking in further, I found the two plants closest to my heart: their coffee and cacao tree. 


Cooking classes (Bollywood Bhanchha) also run at regular intervals throughout the year, and there is also a museum showcasing art exploring the relationship between civilisation and agriculture.  


The good news about my planned day trip isn't just that we can stuff our faces with fresh food made from the gardens of the café. Our next stop is Farm 85 Trading. My companion is part of NTU's gardening club, and many of their bountiful harvest came as seedlings from Farm 85. So close to Farm 85, I couldn't resist the urge. Once there, we flagged down a helpful farmhand who showed us the plants they offer. I delightedly bought pots of basil (for pizza and pasta!), Chinese parsley, roselle, and wee sprouts of ladyfinger and eggplant. It's about $6 for each pot, and the farmhand threw in a pot of kale for free.  


A month has passed since my visit, but I may still get a little teary-eyed when recounting the moment where he told me I could take the pot of kale home with me. Speaking of which, I am now a dedicated supporter of Farm 85 and will no longer visit any other nursery in Singapore... :-)


Walking around in the tropical heat made me a little spazzed out, and we didn't complete my ambitious itinerary to visit the animal farms on my first go. But I finally got my wish to visit Hay Dairies Goat Farm on my return trip to the region. To the consternation of some people online, it's a busy goat farm and there won't be workers waiting for visitors on a welcome bandwagon, but this suits me just fine. I can poke around just fine by myself. Visitors can buy bags of feed for the goats, or watch the milking process. relatively popular with the crowd of young parents and their children. You may purchase their goat milk on the way out, which I am lusting after eyeing to make a batch of raspberry-ripple goat milk gelato


Another place of interest is DairyFolks, with their herd of 100+ cows producing fresh milk daily, some of which goes towards churning ice cream. There isn't any cheese-making going on at the moment, but a guy can dream. Viknesh Dairy Farm is currently closed to public as part of their coronavirus precautions, but much in the same vein, also produces milk for sale. I would love to visit one day!

Travelling restrictions aren't applied to only us tourists, as commercial trade of necessity goods have been similarly affected. The pandemic gave Singapore quite the food scare last year, with shelves on groceries stores emptied of pantry staples. Since then, the topic of food security have become a pressing concern, as fresh produce from our trading partners is no longer guaranteed. There have been a direction made towards supporting local produce. Walking into groceries stores nowadays, we can see vegetables grown locally marked distinctively from the rest. Ensuring a buffer of local produce against trading shock is a necessary step in national security, and the Agri-Food and Veterinary Authority of Singapore has been making investments into reviving and supporting local farmers. For those who are interested in Singapore’s new farming initiative, you can click on the link (it goes to Singapore Food Agency.) 

01 May 2021

Crème Brûlée Recipe

May 01, 2021 0
 Crème Brûlée Recipe

Cooking a multi-course meal for everybody is no easy task, particularly when I mostly have recipes which hog the oven for hours. Once dinner starts and I sit down with everybody, it's also not enjoyable to get up to check on food cooking in the oven. Sometimes, a baked soft cheese fits the bill, as it can be baked in the time it takes to clear the table. But mostly, recipes that you can do ahead are a god-send. A crème brûlée also fits the bill. It's a show-stopper that demands to be refrigerated a day before serving, and with the finishing touches - breaking out the blow torch to complete a layer of crunchy caramel on the custard - applied at the dinner table. 

A burst of flame, and as the scent of slightly singed, caramelising sugar fills the room, it'll be a dinner to remember. 

Crème Brûlée

Adapted from the New York Times 
Makes 6-8 servings
Crème Brûlée, à la burnt cream, is meant to be a luxurious affair: rich, indulgent and to sate with one serving. Because half-and-half leads to a runny custard which may not fully set, I prefer to go all-cream. If you wish to substitute some of the cream with milk, the milk should be capped within 25% volume.   

INGREDIENTS 
480ml (2 cups) heavy cream 
1 vanilla bean, split lengthwise
⅛  teaspoon salt
5  egg yolks
50g granulated sugar + more for topping

STEPS

Preheat oven to 160C. 

In a small saucepan set over low heat, combine cream, vanilla bean and salt. Bring it just until it starts to simmer, and then remove from heat. If you are using vanilla extract, add it just as you remove the pan from the heat. Let sit for a few minutes. If using vanilla bean, remove that from the cream mixture. 

In a bowl, beat yolks and sugar together until light. Lightly temper the yolks by slowly drizzling a quarter of the warm cream into the yolk mixture while whisking briskly, before pouring the yolk mixture into the pot of warm cream. Whisk continuously as you do. Avoid using an electric mixer at this stage, which can cause the cream mixture to foam up. Strain the mixture. 

Set shallow ramekins in a leak-proof baking tray. Pour the cream mixture into the ramekins. Place tray into preheated oven, and then fill baking tray with boiling water about 1cm in height (roughly half the height of the ramekins). Bake for 20 to 30 minutes, until centers are barely set. Remove from oven and carefully remove each ramekin from the hot water bath. Allow to cool completely to room temperature, and then refrigerate for several hours until well-chilled. At this point, the custard can be kept for a couple of days. 

When ready to serve, top each custard with a light scatter of sugar (about 1-2 teaspoons). Apply blow torch at a low heat to the sugar to gently melt and caramelise it to an amber hue. The caramel will harden as it cools. Allow it to cool slightly before serving.

25 April 2021

Anne Burrell’s Braised Short Ribs Recipe

April 25, 2021 0
Anne Burrell’s Braised Short Ribs Recipe

Just as the COVID vaccine is rolling out across the general population, and restrictions on social gathering is (sorta) loosening up a little, I’ve taken the chance to get out of the house a little. I've had a week of respite from work, and filled my calendar with leisure and activities. 

I’ve bought some tennis balls, dusted off my racquet and am easing back into the game.  Tennis as a sport is probably as socially distanced as one can get, so I'm pretty safe. I’ve started jogging as well, and also (well, attempted to) play golf at a driving range, all activities suitable to keep people at a healthy arm’s length away. (Especially in golf, where me swinging metal clubs with impunity gets me a wide berth from other people.)


I've also taken to exploring Singapore for a bit. A trip to a local farm in the North-West farming regions of the country had netted me an ample pot of sweet basil, and baby plants of ladyfinger, eggplants, roselle and kale. I really don’t have a good record with young plants, but #8thtimelucky? 


This week of respite from work also coincided with a grocery store’s sale on beef short ribs, and so I spent one morning carting several kilos of these beauts home. At the top of my to-do cook list is Anne Burrell’s Short Ribs, which was spectacular indeed.  


The first time I did this recipe, adding the marbled beef ribs to the hot pan filled the entire kitchen and living room with the fragrance of seared beef, which I didn't mind so much. But as I discovered, searing beef indoors also deposits a thin film of oil all over the kitchen and the floor of the living room. Oops. So now I’ve wisened up, and started using my outdoor stove, which also made adding bits of herbs from my garden into my pot a little easier.    


Anne Burrell’s Braised Short Ribs 
Adapted from the Food Network
Makes 3-4 servings
Short ribs yield much more tender meat than cheaper cuts like general packaged 'stew meat', and should be used for better results. I've used both bone-in and boneless, and both versions are delicious. As a general rule, One rib (bone-in) per person should be adequate alongside a side dish such as mashed potato, noodles or rice. There's plenty of downtime in this recipe, which I use to put together a quick mashed potato recipe from Gordon Ramsay. (I add one minced garlic to the milk/butter/cream component of the mashed potato recipe, which adds an additional depth of flavour to the potato.) Leftover meat can be deboned and tossed with its sauce and pasta the next day for a quick meal. 


INGREDIENTS

3 bone-in beef short ribs (about 1.3kg), cut into individual ribs
Kosher salt
Extra-virgin olive oil
1/2 large Spanish onion (if you can’t find Spanish onions, regular is fine)
1 rib celery
1 carrot, peeled
1 clove garlic, smashed
180ml (3/4 cup) tomato paste
1 - 1 1/2 cups red wine
About 2 cups water
1 small bunch of fresh thyme, tied with kitchen string
1 bay leaf


STEPS

1. Preheat the oven to 190C.


2. Season each short rib with salt and set aside as you prepare the rest of the ingredients. Cut the carrot, onion and celery into small pieces. Purée them with garlic in the food processor, until coarse paste is formed. If you don't feel like cleaning up a food processor after, I mince the vegetables as finely as I can manage instead.  


3. When ready, place a roasting tray or large pot over high heat, and add olive oil. When the olive oil is lightly smoking, add the short ribs to the pan. Do not overcrowd pan; cook in batches, if necessary. Brown each side of the beef rib very well, about 2 to 3 minutes per side, and then remove from pan. 


4. Drain the oil and scrap any burnt bits off the bottom of the pot. Return to high heat, and add more fresh olive oil to the bottom of the pot. Add the pureed vegetables and season with salt. If you have minced your vegetables instead of using a food processor, you may need to drizzle a couple of tablespoons of water in to help the vegetables soften more. Stir occasionally, scrapping the fond off the bottom of the pot, and cook until the vegetables are dark brown, about 5 to 7 minutes. Lower the heat if things start to burn. Add the tomato paste, and let brown for 4 to 5 minutes, scrapping off fond that develops. Add the wine and deglaze the bottom of the pot, and continue to cook until the mixture is reduced by half.


5. Return the short ribs to the pot and add water, until the water has just about covered the meat. Add thyme and bay leaf. Cover the pot and place in the preheated oven. Cook for 2 - 2.5 hours. Check periodically during the cooking process and add more water, if needed. Turn the ribs over halfway through the cooking time. In the last 20 minutes of cooking, remove the lid from the pot so the sauce can further reduce and get nicely browned. Remove from the oven when the meat is very tender but not falling apart. Serve with the braising liquid.

17 April 2021

Risotto With Crispy Mushrooms Recipe - A Risotto Cooked in the Oven

April 17, 2021 0
Risotto With Crispy Mushrooms Recipe - A Risotto Cooked in the Oven


I ambitiously bought several kilos of rice on a late-night grocery shopping spree last year, and filled my larder with bags of Japanese sushi rice, Arborio Rice and Calasparra Rice. I'm still getting around to the sushi rice, but I've been having a grand time exploring Italian and Spanish recipes. 


This recipe is one great find, and became an instant favourite. Most of the work is done in the oven. The mushrooms gradually crisp up in the oven over an hour, leaving you with ample time to leisurely dice the onions, grate the parmesan and indulge in a glass of pre-dinner wine. 


Risotto With Crispy Mushrooms Recipe 

If you're cooking for someone who enjoys a meal with a portion of protein on the side, seafood such as seared scallops, squid or prawns would be a welcome addition. 

Original Recipe from Epicurious
Makes 3-4 servings

INGREDIENTS

1 lb. mixed wild, shiitake, and/or crimini mushrooms, broken into pieces or sliced 1/4" thick (about 4 cups)
3 garlic cloves, peeled, thinly sliced
6 thyme sprigs
1/4 tsp. crushed red pepper flakes
1/4 cup plus 2 Tbsp. extra-virgin olive oil, plus more for drizzling
1/4 + 1/4 tsp fine salt
1 medium onion, finely chopped
1 cup arborio rice
1/2 tsp. freshly ground black pepper
1/2 cup dry vermouth or white wine
2.5 + 0.5 cups homemade chicken stock or low-sodium chicken broth
60g finely grated Parmesan 
2 Tbsp. cold unsalted butter, cut into pieces
1/2 tsp. finely grated lemon zest
1/3 cup coarsely chopped parsley leaves
Lemon wedges (for serving)

STEPS

1. Preheat oven to 175°C. Set a rack in bottom third of oven. 


2. Combine sliced mushrooms, garlic, thyme, red pepper flakes, 1/4 cup olive oil, and 1/4 tsp. salt on an unlined rimmed baking sheet. Roast on bottom rack for 45 minutes to an hour,  until the slices are deeply golden brown and crisped. As the mushrooms roast, they will release their water contents. After 10 minutes into roasting, any liquid can be removed (to reserve for cooking the risotto. About 30 minutes into roasting, scrape and toss the mushrooms to prevent burning. When the mushrooms are just about done, set the oven to broiler and place the tray of mushrooms in the top rack to crisp the sides up further. Remove from oven and let cool.


3. As the mushrooms are roasting, heat 2 tbsp. olive oil in a large ovenproof pot set over medium-high heat. Add onion and cook for about 3–5 minutes, stirring often, until softened and slightly translucent. Stir in rice; season with pepper and 1/2 tsp. salt. Cook, stirring occasionally, until some grains are translucent, about 2 minutes. Add vermouth to deglaze the pot. Stir, until most of the vermouth has evaporated, and then add the reserved mushroom juice. Add 2.5 cups stock (reserving 1/2 cup stock for afterwards). Allow the stock to come simmer, then cover with an ovenproof lid and transfer to the oven and continue cooking for about 15–18 minutes, until liquid is mostly absorbed but rice is still slightly firm in the center.


4. Return pot to medium heat on a stove. Add the remaining 1/2 cup stock stir constantly, until the rice is tender but still has some bite, about 2 minutes. Remove from heat and stir in Parmesan, butter, and lemon zest. Season to taste with salt, if needed. 


5. Portion the risotto into individual portions, top with crispy mushrooms, parsley and any protein. Serve immediately. Serve with lemon wedges alongside.

10 April 2021

Dumpling Wings Recipe

April 10, 2021 1
Dumpling Wings Recipe


Using equal parts cornflour/AP flour leads to thin, wafer-like and non-lattice structure (as compared to the lattice structure using tapioca starch - as below) 

Of all the recipes that I do, the ones that get revisited a lot more are those that can be served for breakfast, lunch, dinner or even as a between-meal snack. That means things that are things that are simple and fast (no slow roasts, and not platefuls of carbohydrate). An omelette is one such dish, as are Kimchi pancakes and dumplings. Today, I'll like to, if I can, to ponder over my love for dumplings. 

Of course, this isn't a recipe to make dumplings from scratch. This post is about a simple trick to get crispy thin "wings" attached to your pan-fried dumplings. Using frozen, store-bought dumplings are perfectly fine. Given that the technique was first developed in Tokyo in the 1980s, Japanese gyoza would be perfect for this, though I've seen Chinese restaurants employ this technique for their 饺子 (potstickers). I've gotten my dumplings from a store near my workplace in Jurong Gateway at 山东東记拉面小笼包 (the current rate is a bag of frozen dumplings at 30 for $10, and as you can see, these are huge and juicy!) My home non-stick skillet is 8-inch, though any size would work as long as the dumplings fit and there is a well-fitting lid.  

Pan-frying dumpling involves adding dumplings to a hot pan with a thin layer of oil until the bottom is browned, then adding water to the pan, covering it with a lid and steaming the dumplings well cooked on the inside. The trick to getting delicate crisp wings is adding half a tablespoon of tapioca starch to the water you use to steam the dumplings. As the water cooks off, the starch remains and forms the wings.

Tapioca starch

Dumpling Wings Recipe
Original recipe from J. Kenji López-Alt
I've tried this recipe with both gyoza and regular Chinese dumplings. The essence remains the same, though plumper dumplings (like the Chinese ones I've made with) will require a bit more water to completely cook the dumplings.  

INGREDIENTS

1-2 tbsp flavourless oil, such as canola oil 
Dumplings, fresh or frozen
80ml water 
1 tbsp tapioca flour
Black vinegar, with 
julienned ginger (cut into long thin strips) - optional

STEPS

1. Set a non-stick pan over medium-high heat. Add a thin layer of oil. 

2. When the oil gets hot, add dumplings. If using gyoza, you may choose to arrange them in a spiral pattern. Whichever way you choose, leave some space between dumplings to develop the 'wings'. Allow the bottom of the dumplings to brown. 

3. As the dumplings are cooking, add flour to a measuring cup. Drizzle water in, stirring as you do to form a thin slurry. When the bottoms of the dumplings are browned, pour the slurry into the hot pan (beware of rising steam as you do so), then cover the with lid and continue to cook until the water has evaporated and you're left with a thin crisp layer.

4. Evert onto a serving plate. Serve immediately. Black vinegar and ginger are common accompaniments.